Content Menu
● Benefits of Using a Food Dehydrator for Drying Herbs
● How to Dry Herbs in a Food Dehydrator
● Common Herbs Suitable for Dehydration
● Tips for Successful Herb Drying
● Herb Drying Techniques Compared
● What Happens During the Drying Process?
● Creative Uses for Dried Herbs
● Conclusion
● FAQs
>> 1. How long does it take to dry herbs in a food dehydrator?
>> 2. What temperature should I set my dehydrator for drying herbs?
>> 3. Can I dry mixed herbs together?
>> 4. How do I know when my herbs are fully dried?
>> 5. Can I use frozen herbs in my dehydrator?
● Citations:
Drying herbs is a time-honored method of preserving their flavor and aroma, making them available for culinary use throughout the year. A food dehydrator is an excellent tool for this purpose, as it allows for controlled drying conditions that can enhance the quality of the dried herbs. In this article, we will explore the process of drying herbs using a food dehydrator, discuss the benefits, provide step-by-step instructions, and answer common questions related to this practice.

Benefits of Using a Food Dehydrator for Drying Herbs
Using a food dehydrator to dry herbs offers several advantages:
- Controlled Temperature: Dehydrators allow you to set specific temperatures, ensuring that herbs are dried at optimal levels (typically between 90°F and 115°F). This helps preserve their color, flavor, and nutritional value.
- Efficiency: Dehydrators can dry large quantities of herbs simultaneously, saving time and effort compared to traditional methods like air drying.
- Quality Preservation: The low heat used in dehydrators prevents the loss of essential oils and flavors that can occur with higher temperatures.
- Reduced Risk of Contamination: Unlike air drying, which exposes herbs to dust and insects, dehydrators provide a clean environment for drying.
How to Dry Herbs in a Food Dehydrator
Drying herbs in a food dehydrator is a straightforward process. Follow these steps for best results:
1. Prepare Your Herbs:
- Start with fresh herbs. Rinse them gently under cool water to remove any dirt or insects.
- Pat them dry with a clean towel to remove excess moisture.
- Remove leaves from thick stems if necessary; smaller herbs can be left whole.
2. Preheat the Dehydrator:
- Set your dehydrator to a temperature between 90°F and 115°F. The exact temperature may depend on the type of herb and your local humidity levels. If you live in a particularly humid climate, you may want to increase the temperature slightly up to 125°F[1][2].
3. Arrange the Herbs:
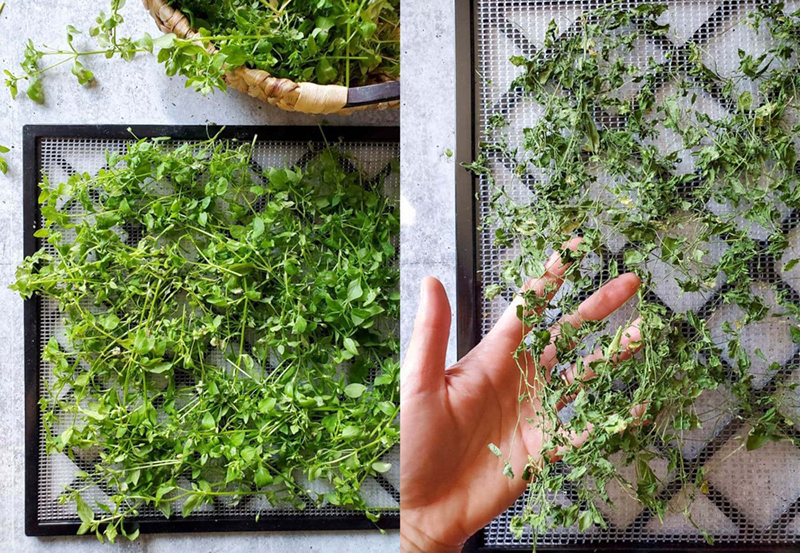
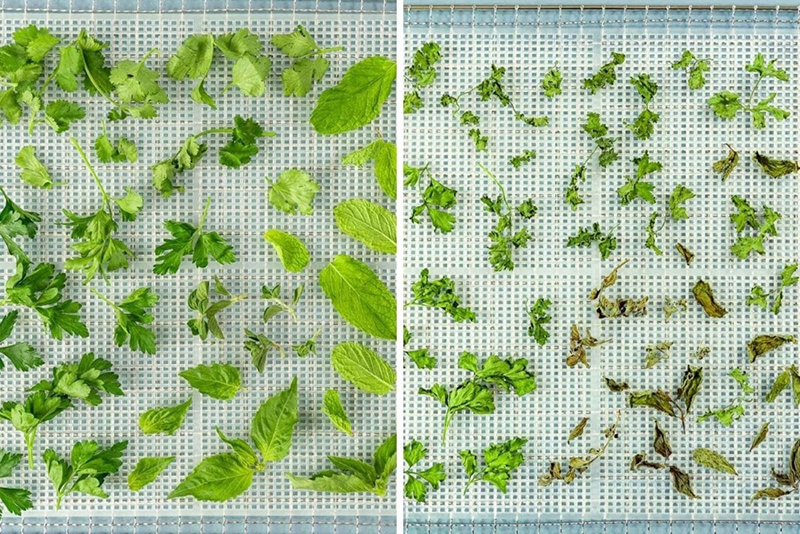
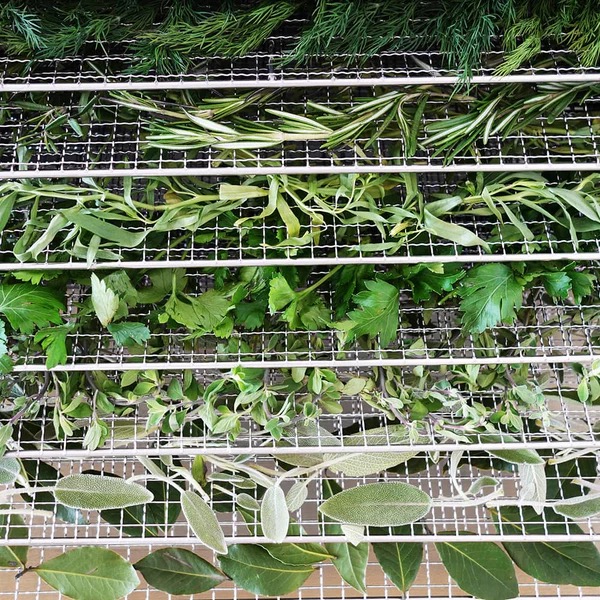
- Place the prepared herbs in a single layer on the dehydrator trays. Avoid overcrowding to ensure even airflow.
- For small-leafed herbs like thyme or dill, consider lining the trays with parchment paper or using silicone mats to prevent leaves from falling through.
4. Drying Time:
- Drying times vary depending on the type of herb and its moisture content. Most herbs will take between 1 to 4 hours to dry completely.
- Check periodically for dryness; herbs should be brittle and crumble easily when fully dried[1][2].
5. Storage:
- Once dried, allow the herbs to cool completely before storing them in airtight containers or glass jars.
- Label containers with the herb name and date for future reference.

Common Herbs Suitable for Dehydration
Many different types of herbs can be successfully dried using a food dehydrator. Some popular options include:
- Basil
- Oregano
- Thyme
- Rosemary
- Sage
- Mint
- Parsley
Each herb has its unique drying time and temperature requirements, so it's essential to consult specific guidelines for each variety[1][2].
Tips for Successful Herb Drying
To maximize your success when drying herbs in a dehydrator, consider these tips:
- Use Fresh Herbs: Always start with fresh, high-quality herbs for the best flavor and aroma in your dried product.
- Avoid Overloading: Do not overcrowd trays; ensure good airflow around each herb for even drying.
- Monitor Humidity Levels: If you live in a humid climate, you may need to increase the temperature slightly or extend drying times.
- Store Properly: Keep dried herbs in a cool, dark place away from direct sunlight to maintain their potency.
Herb Drying Techniques Compared
While using a food dehydrator is one of the best methods for drying herbs, there are other techniques worth mentioning:
| Method | Description | Pros | Cons |
| Food Dehydrator | Uses low heat and airflow to dry herbs quickly and efficiently | Controlled environment; quick | Requires an appliance |
| Air-Drying | Hanging bundles of herbs in a dry area | No equipment needed; natural | Takes longer; risk of dust/insects |
| Oven-Drying | Using low heat in an oven (pilot light) | Faster than air-drying | Can lose flavor if too hot |
| Microwave | Quickly dries small amounts of herbs | Fastest method | Risk of uneven drying |
What Happens During the Drying Process?
When you dry herbs, several changes occur:
- Moisture Removal: The primary goal is to remove moisture from the plant material. This process inhibits microbial growth and enzymatic reactions that could spoil the product.
- Concentration of Flavors: As moisture evaporates, flavors become more concentrated. This means that dried herbs are often more potent than their fresh counterparts—approximately three times stronger[8].
- Changes in Color and Aroma: While some color loss is inevitable during drying, using lower temperatures helps preserve vibrant colors and aromatic compounds[7].
Creative Uses for Dried Herbs
Dried herbs are versatile ingredients that can enhance various dishes. Here are some creative ways to use them:
- Seasoning Blends: Combine different dried herbs with spices to create custom seasoning blends for meats or vegetables.
- Herbal Teas: Use dried mint, chamomile, or other herbal varieties to brew soothing teas.
- Soups and Stews: Add dried herbs at the beginning of cooking to infuse flavors into soups and stews.
- Baking: Incorporate dried rosemary or thyme into bread recipes for added flavor.
Conclusion
Using a food dehydrator is one of the most efficient and effective methods for drying herbs at home. By following proper techniques and guidelines, you can preserve your favorite herbs' flavors and aromas for use in cooking throughout the year. Not only does this enhance your culinary creations, but it also allows you to enjoy homegrown or locally sourced herbs long after their growing season has ended.

FAQs
1. How long does it take to dry herbs in a food dehydrator?
Most herbs take between 1 to 4 hours to dry completely in a food dehydrator, depending on their moisture content and thickness.
2. What temperature should I set my dehydrator for drying herbs?
The ideal temperature range for drying herbs is typically between 90°F and 115°F.
3. Can I dry mixed herbs together?
Yes, but ensure that all herbs have similar drying times; otherwise, some may become over-dried while others remain moist.
4. How do I know when my herbs are fully dried?
Dried herbs should be brittle and crumble easily when crushed between your fingers. If they feel flexible or moist, they need more time in the dehydrator.
5. Can I use frozen herbs in my dehydrator?
While fresh herbs yield better results, you can dry frozen herbs if they are thawed and patted dry first; however, they may not retain as much flavor as fresh ones.
Citations:
[1] https://theherbalacademy.com/blog/dry-fresh-herbs-using-a-dehydrator/
[2] https://brodandtaylor.com/blogs/recipes/dehydrating-herbs
[3] https://www.thespruceeats.com/harvesting-and-drying-leafy-herbs-1327541
[4] https://extension.oregonstate.edu/sites/default/files/documents/8836/sp50921dryingherbs.pdf
[5] https://homesteadingfamily.com/how-to-dry-herbs/
[6] https://extension.psu.edu/lets-preserve-drying-herbs
[7] https://cottagecookbook.co.uk/grow/drying-herbs-in-a-dehydrator/
[8] https://www.luvele.de/blogs/recipe-blog/best-tips-for-drying-herbs-in-a-food-dehydrator
[9] https://www.luvele.es/blogs/recipe-blog/best-tips-for-drying-herbs-in-a-food-dehydrator
[10] https://nchfp.uga.edu/how/dry/recipes/herbs/


