Content Menu
● Introduction
● Why Regular Cleaning Matters
● Essential Components of a Cabinet Type Dehydrator
● Step-by-Step Cleaning Guide
>> Step 1: Disassembly
>> Step 2: Vacuuming
>> Step 3: Wipe Down
>> Step 4: Washing Removable Parts
>> Step 5: Drying All Parts
>> Step 6: Reassemble and Dry with Air Circulation/Heat
● Addressing Stubborn Residue and Stains
● Advanced Cleaning Techniques
● Additional Cleaning Tips
● Maintaining Your Dehydrator
● Troubleshooting Common Issues
● Best Practices for OEM Service Providers
● Conclusion
● FAQ
>> 1. How often should I clean my dehydrator?
>> 2. Can I use dish soap to clean the trays?
>> 3. What should I do if food is sticking to the trays?
>> 4. How do I maintain the filters in my dehydrator?
>> 5. What should I do if the heating element is damaged?
● Citations:
Introduction
Maintaining a clean cabinet-type dehydrator is crucial for ensuring its longevity, efficiency, and the safety of the dehydrated products. Regular cleaning prevents the build-up of food particles, reduces the risk of contamination, and ensures consistent performance. This guide provides best practices for cleaning and maintaining your food dehydrator, specifically focusing on cabinet-type models. This is particularly important for OEM (Original Equipment Manufacturer) service providers, brands, wholesalers, and manufacturers who rely on these machines for consistent output.
Why Regular Cleaning Matters
1. Hygiene and Safety: Food debris can harbor bacteria and mold, which can contaminate subsequent batches of food. Regular cleaning eliminates these risks, ensuring that all dehydrated products are safe for consumption. Improperly cleaned dehydrators can lead to the growth of harmful microorganisms like Salmonella, E. coli, and various molds, posing serious health risks to consumers.
2. Efficiency: Accumulated food particles can obstruct airflow, reducing the dehydrator's efficiency. A clean dehydrator operates more effectively, using less energy and producing better results. Blocked airflow forces the motor to work harder, leading to increased energy consumption and potentially overheating.
3. Longevity: Proper maintenance, including regular cleaning, extends the life of the dehydrator. Neglecting cleaning can lead to corrosion, damage to components, and premature failure. Food acids and sugars can corrode metal parts over time if not removed, while dust and debris can clog the fan motor, leading to burnout.
4. Consistent Performance: Clean dehydrators ensure even drying. Food particles can cause uneven heat distribution, affecting the quality and consistency of the dehydrated product. This is particularly important for commercial operations where uniformity is crucial for product standards.
5. Odor Prevention: Lingering food particles can create unpleasant odors, which can transfer to subsequent batches of food. Regular cleaning helps to keep your dehydrator smelling fresh and prevents cross-contamination of flavors.
Essential Components of a Cabinet Type Dehydrator
Before diving into cleaning procedures, understanding the main components of a cabinet-type dehydrator is essential. Familiarity with these parts will make the cleaning process more effective and prevent accidental damage:
- Heating Element: Generates the heat needed for drying. Typically located at the back or bottom of the dehydrator.
- Fan: Circulates hot air evenly throughout the cabinet. This ensures consistent drying across all trays.
- Thermostat: Regulates the temperature to ensure consistent drying. Accurate temperature control is crucial for preventing spoilage and ensuring proper dehydration.
- Trays: Hold the food items during the dehydration process. Trays can be made of plastic, stainless steel, or a combination of materials.
- Control Panel: Allows users to set temperature and time. Digital control panels offer more precise settings and often include pre-programmed modes for different types of food.
- Cabinet: Encloses all components, maintaining consistent temperature. The cabinet is typically made of stainless steel or durable plastic and is designed to insulate and retain heat.

Step-by-Step Cleaning Guide
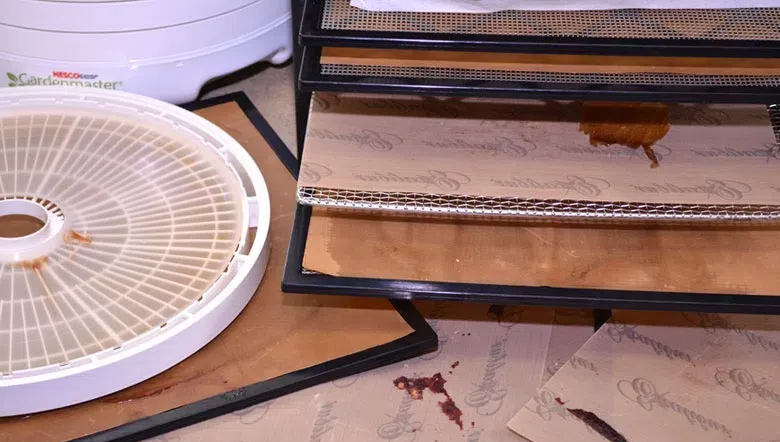
Step 1: Disassembly
The first step in cleaning your dehydrator is to disassemble it. Remove all trays, mesh liners, silicon trays, or any other removable parts. This allows access to all areas for thorough cleaning. Disconnecting the dehydrator from the power source before disassembly is essential for safety.
Step 2: Vacuuming
Use a vacuum cleaner to remove any loose debris, crumbs, or food particles from the interior of the dehydrator. Pay special attention to corners and crevices where debris may accumulate. A vacuum with a narrow nozzle attachment is particularly useful for reaching tight spaces.
Step 3: Wipe Down
After vacuuming, use a clean cloth or sponge dampened with an antibacterial spray to wipe down the inside and outside of the dehydrator. Ensure to clean any spills, stains, or residue thoroughly to prevent bacteria growth and keep the dehydrator smelling fresh. Be careful not to splash water onto the heating element (located behind the screening and fan in the back of the Cabinet) while cleaning the inside of the Cabinet. Water could damage the heating element and increases the risk of electric shock. Do not immerse the dehydrator in water. Mild detergents or food-safe cleaners are ideal for wiping down the interior surfaces.
Step 4: Washing Removable Parts
Wash the trays, mesh liners, and silicon trays with warm, soapy water. Use a soft brush or sponge to scrub away any stuck-on food or residue. Rinse thoroughly with clean water. A 20-minute soak in warm soapy water is often enough to clean the dehydrator parts. For stubborn residues, a soak in a solution of water and baking soda can be effective. For heavily soiled trays, a paste of baking soda and water can be applied directly to the stains and left to sit for a few hours before scrubbing.
Step 5: Drying All Parts
Ensure all removable parts are completely dry before reassembling the dehydrator. Moisture left on the trays or liners could lead to mold or bacterial growth. Air dry them or use a clean towel to pat them dry. Placing the washed parts in a well-ventilated area or using a clean, dry towel can speed up the drying process.
Step 6: Reassemble and Dry with Air Circulation/Heat
Once all parts are dry, reassemble the dehydrator. Ensure each tray is properly aligned and securely in place. Turn on the dehydrator on high for 10 to 30 minutes to ensure all parts are completely dry and ready for the next use with no chance of moisture growth. This final drying step helps to eliminate any residual moisture and sanitize the interior of the dehydrator.
Addressing Stubborn Residue and Stains
1. Baking Soda Paste: For stubborn stains or residue on trays and liners, create a paste of baking soda and water. Apply the paste to the affected areas, let it sit for 30 minutes, then scrub and rinse thoroughly.
2. Vinegar Solution: Vinegar is an excellent natural cleaner and disinfectant. Mix equal parts of white vinegar and water in a spray bottle. Spray the solution on the affected areas, let it sit for 15 minutes, then wipe clean. Vinegar is particularly effective for removing mineral deposits and hard water stains.
3. Steam Cleaning: For dehydrators with particularly stubborn residue, consider using a handheld steam cleaner. The steam can loosen the residue, making it easier to wipe away. Be careful not to direct steam at electrical components.
Advanced Cleaning Techniques
1. Ultrasonic Cleaning: For commercial operations, ultrasonic cleaning can be an efficient way to clean multiple trays at once. Ultrasonic cleaners use high-frequency sound waves to create tiny bubbles that loosen and remove dirt and debris.
2. Enzyme Cleaners: Enzyme cleaners can be used to break down organic matter, such as food particles and grease. These cleaners are particularly useful for dehydrators that process a lot of high-fat foods.
Additional Cleaning Tips
1. Frequency: It is recommended to clean your dehydrator after each use. This prevents the build-up of food particles and ensures the machine is always ready for the next batch.
2. Dish Soap: Yes, you can use dish soap to clean the dehydrator trays. Ensure you rinse them thoroughly to remove any soap residue before placing them back in the dehydrator.
3. Non-Scratch Pads: If soaking doesn't work, use a non-scratch pad to lightly scrub trays, liners, and inserts. Avoid using abrasive cleaners or steel wool, as these can scratch the surfaces.
4. Non-Stick Liners: Put a non-stick liner in the bottom of the dehydrator to prevent food from dripping. These liners can be easily removed and cleaned, reducing the amount of mess inside the dehydrator.
Maintaining Your Dehydrator
1. Filter Maintenance: If your food dryer has filters, check them regularly and clean or replace them as needed. Filters help keep the air circulating inside the dryer clean and prevent debris from accumulating on the food. Clean the filters every 1-3 months, depending on usage.
2. Inspections: Regularly inspect the food dryer for any signs of damage, wear, or malfunction. Check electrical connections, heating elements, fans, and other components to ensure they are in good working condition. If you notice any issues, consult the manufacturer's instructions or contact a professional for repairs. Conduct thorough inspections at least every six months.
3. Lubrication: Some commercial food dryers may have moving parts that require lubrication. Consult the manufacturer's instructions to determine if lubrication is necessary and how often it should be performed. Use the recommended lubricant and follow the instructions carefully. Lubricate moving parts at least annually, or as recommended by the manufacturer.
4. Storage: When not in use, store the dehydrator in a cool, dry place. Cover it to protect it from dust and pests. Proper storage protects the dehydrator from damage and extends its lifespan.
Troubleshooting Common Issues
- Food Sticking to Trays: To prevent food from sticking to the trays, use parchment paper or non-stick drying sheets. Also, ensure that the food is properly prepared and not overly wet. Blanching fruits and vegetables before dehydrating can also help to reduce sticking.
- Uneven Drying: Uneven drying can be caused by improper loading of the trays. Ensure that the food is evenly spaced and not overcrowded. Also, rotate the trays periodically during the drying process to ensure even exposure to heat.
- Damaged Heating Element: If the heating element is damaged, contact a qualified technician for repair or replacement. Do not attempt to repair it yourself, as this could be dangerous. Signs of a damaged heating element include inconsistent temperature, unusual noises, or visible damage to the element.
- Fan Malfunction: If the fan is not working properly, it can lead to poor air circulation and uneven drying. Check the fan for obstructions and ensure that it is properly lubricated. If the fan is still not working, it may need to be replaced.
- Unpleasant Odors: Unpleasant odors can be caused by lingering food particles or mold growth. Thoroughly clean the dehydrator and ensure that all parts are completely dry before reassembling. You can also run the dehydrator with a bowl of vinegar or baking soda to help absorb odors.
Best Practices for OEM Service Providers
For OEM service providers, maintaining high standards of cleanliness and maintenance is crucial for ensuring the reliability and quality of the dehydrators you supply. Implement the following best practices:
1. Detailed Cleaning Protocols: Develop comprehensive cleaning protocols that outline the steps and procedures for cleaning and maintaining cabinet-type dehydrators. These protocols should be clear, concise, and easy to follow.
2. Training Programs: Provide thorough training programs for your staff on proper cleaning and maintenance techniques. Ensure that all personnel are knowledgeable about the different components of the dehydrator and the importance of regular cleaning.
3. Quality Control Checks: Implement regular quality control checks to ensure that all dehydrators are properly cleaned and maintained before shipment. These checks should include visual inspections and performance tests.
4. Customer Support: Provide excellent customer support to your clients, including guidance on cleaning and maintenance best practices. Offer resources such as manuals, videos, and FAQs to help them keep their dehydrators in top condition.
5. Documentation: Maintain detailed records of all cleaning and maintenance activities, including dates, procedures, and personnel involved. This documentation can be used to track performance and identify areas for improvement.
Conclusion
Maintaining a cabinet-type dehydrator involves regular cleaning, diligent inspection, and prompt troubleshooting. By understanding the key components and following the recommended maintenance steps, you can ensure the dehydrator operates efficiently and safely, providing consistent results for years to come. Properly addressing common issues and keeping a detailed maintenance log will further extend the life and reliability of the appliance. For OEM service providers, adhering to strict cleaning and maintenance protocols is essential for ensuring the quality and reliability of the products you supply.

FAQ
1. How often should I clean my dehydrator?
It is recommended to clean your dehydrator after each use. This prevents the build-up of food particles and ensures your machine is always ready for the next batch.
2. Can I use dish soap to clean the trays?
Yes, you can use dish soap to clean the dehydrator trays. Ensure you rinse them thoroughly to remove any soap residue before placing them back in the dehydrator.
3. What should I do if food is sticking to the trays?
To prevent food from sticking to the trays, you can use parchment paper or non-stick drying sheets. Also, ensure that the food is properly prepared and not overly wet.
4. How do I maintain the filters in my dehydrator?
If your food dryer has filters, check them regularly and clean or replace them as needed. Filters help keep the air circulating inside the dryer clean and prevent debris from accumulating on the food.
5. What should I do if the heating element is damaged?
If the heating element is damaged, contact a qualified technician for repair or replacement. Do not attempt to repair it yourself, as this could be dangerous.
Citations:
[1] https://www.pressurecooker-outlet.com/Manuals/Weston-Steel-Dehydrator.pdf
[2] https://www.wisdompreserved.life/how-to-clean-a-dehydrator
[3] https://septree.com/blogs/news/do-food-dehydrators-home-commercial-need-regular-maintenance
[4] https://patents.google.com/patent/CN110207480A/zh
[5] https://www.dryeratech.com/troubleshooting-common-issues-with-your-cabinet-type-dehydrator.html
[6] https://seedtopantryschool.com/quick-tips-on-how-to-clean-your-dehydrator/
[7] https://farmerswiferambles.com/care-for-your-food-dehydrator/
[8] http://download.beko.com/Download.UsageManualsBeko/CN/25219_1_2960310325_KM.pdf
[9] https://www.aimheatpump.com/a-news-how-to-clean-a-food-dehydrator-base
[10] https://www.backcountrypaleo.com/cleaning-food-dehydrator/
[11] https://www.nesco.com/wp-content/uploads/2024/07/Dehydrator-Instructions-and-Recipes-Booklet-300-02750.pdf


