Content Menu
● Understanding Food Dehydration
>> Benefits of Using a Food Dehydrator
● Types of Food Dehydrators
● Materials Needed
● Step-by-Step Guide to Building a DIY Food Dehydrator
>> Step 1: Design Your Dehydrator
>> Step 2: Construct the Frame
>> Step 3: Install Mesh Trays
>> Step 4: Add Heat Source (for Electric Models)
>> Step 5: Incorporate Air Circulation
>> Step 6: Create Ventilation
>> Step 7: Insulate (Optional)
● Using Your Food Dehydrator
● Common Mistakes When Dehydrating Food
● Creative Uses for Dried Foods
● Maintaining Your Food Dehydrator
● Conclusion
● FAQ
>> 1. What foods can I dehydrate?
>> 2. How long does it take to dehydrate food?
>> 3. Can I use my oven as a dehydrator?
>> 4. How do I store dehydrated foods?
>> 5. Is it safe to dehydrate meat?
● Citations:
Building a food dehydrator can be an exciting and cost-effective way to preserve fruits, vegetables, and even meats. This guide will walk you through the process of creating your own food dehydrator, whether you prefer a solar-powered model or an electric one.

Understanding Food Dehydration
Food dehydration is the process of removing moisture from food to inhibit the growth of bacteria, yeast, and mold. This method not only extends the shelf life of food but also concentrates flavors and nutrients.
Benefits of Using a Food Dehydrator
- Preservation: Extends the shelf life of fruits, vegetables, and meats.
- Nutrient Retention: Keeps most vitamins and minerals intact.
- Flavor Enhancement: Concentrates the flavors of dried foods.
- Cost-Effective: Saves money by reducing food waste.
- Healthy Snacks: Provides a healthy alternative to processed snacks.
Types of Food Dehydrators
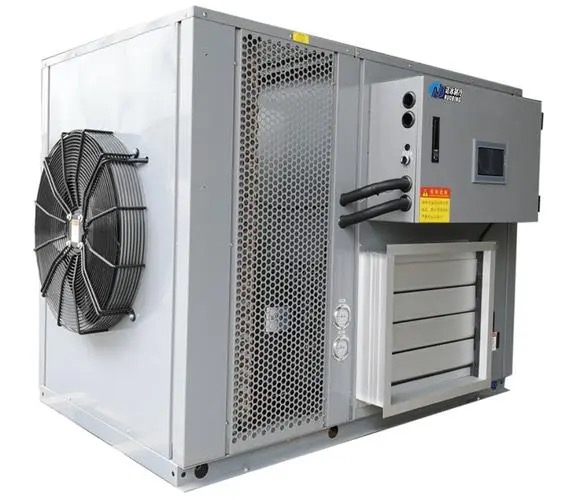
1. Electric Dehydrators: These are plug-in appliances that use electric heat and fans to circulate air around the food.
2. Solar Dehydrators: These utilize sunlight as a heat source, making them eco-friendly and energy-efficient.
3. DIY Dehydrators: Homemade models can be constructed from various materials, allowing for customization based on personal needs.
Materials Needed
Depending on the type of dehydrator you choose to build, here are some common materials:
- For Electric Dehydrators:
- Wood or plywood for the frame
- Heating element (light bulb or heating pad)
- Fan for air circulation
- Mesh trays for placing food
- Insulation material (optional)
- For Solar Dehydrators:
- Old cabinet or wooden box
- Glass panels (for sunlight penetration)
- Black paint (to absorb heat)
- Wire mesh for trays
- Ventilation holes
Step-by-Step Guide to Building a DIY Food Dehydrator
Step 1: Design Your Dehydrator
Decide on the size and type of dehydrator you want to build. Sketch a blueprint to visualize the layout. Consider how much food you plan to dehydrate regularly; this will influence the size of your dehydrator.
Step 2: Construct the Frame
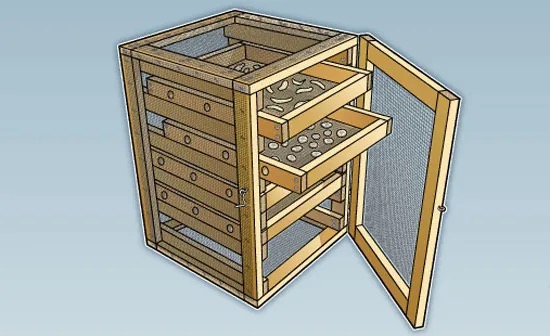
Using wood or plywood, create a rectangular frame that is large enough to hold multiple trays. Ensure there is adequate space for airflow between trays.
Step 3: Install Mesh Trays
Cut food-safe mesh to size and attach it to wooden supports to create trays. Space them evenly within the frame.
Step 4: Add Heat Source (for Electric Models)
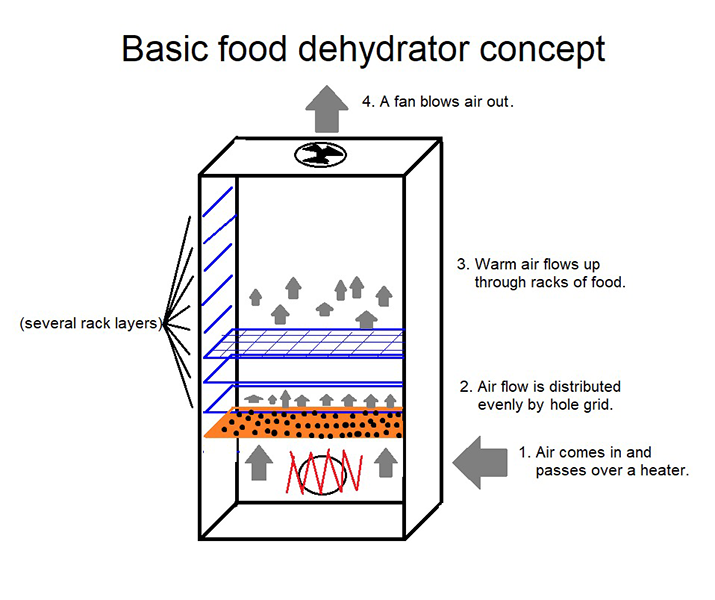
Install a heating element at the bottom of your dehydrator. This could be a light bulb or heating pad.
Example of wiring for an electric dehydrator:
1. Drill a hole for the electrical box.
2. Secure the heating element inside.
3. Connect wiring safely according to electrical codes.

Step 5: Incorporate Air Circulation
Install a fan at the top or side of your dehydrator to promote air circulation. Proper airflow is crucial for even drying.
Step 6: Create Ventilation
Drill small holes at both the top and bottom of the dehydrator to allow moisture to escape while maintaining airflow.
Step 7: Insulate (Optional)
If you're building an electric dehydrator, consider adding insulation around the frame to maintain consistent temperatures.
Using Your Food Dehydrator
Once assembled, follow these steps to use your dehydrator effectively:
1. Preparation:
- Wash fruits and vegetables thoroughly.
- Slice them uniformly for even drying.
- Blanch vegetables like carrots or green beans before drying to preserve color and nutrients.
2. Arranging Food on Trays:
- Place food in a single layer on mesh trays.
- Avoid overlapping pieces to ensure proper airflow.
3. Drying Process:
- Position your dehydrator in a well-ventilated area with good airflow.
- Set your desired temperature; typically between 125°F to 135°F (52°C to 57°C) works well for most foods.
- Monitor drying time; fruits may take several hours while meats could take longer.
4. Testing for Doneness:
- Check periodically if food is dried properly by testing its texture. Dried fruits should be pliable but not sticky, while vegetables should be crisp.
5. Cooling and Storing:
- Allow dried foods to cool completely before storing them in airtight containers.
- Label containers with dates for tracking freshness.
Common Mistakes When Dehydrating Food
Avoiding common pitfalls can enhance your dehydration experience:
- Overcrowding Trays: Ensure proper spacing between pieces for optimal airflow.
- Inconsistent Slicing: Uniform slices ensure even drying; thicker pieces will take longer.
- Ignoring Temperature Settings: Different foods require different temperatures; follow guidelines for best results.
- Not Testing for Doneness: Always check if food is adequately dried before storage; improperly dried food can spoil quickly.
Creative Uses for Dried Foods
Dried foods can be used in various culinary applications:
- Snacking: Enjoy dried fruits like apples, bananas, or apricots as healthy snacks.
- Cooking Ingredients: Use dried herbs and vegetables in soups, stews, and sauces for added flavor.
- Trail Mixes: Combine dried fruits with nuts and seeds for nutritious trail mixes perfect for hiking or outdoor activities.
- Baking: Incorporate dried fruits into muffins, breads, or granola bars for enhanced taste and texture.
Maintaining Your Food Dehydrator
To ensure longevity and efficiency:
- Clean trays after each use with warm soapy water.
- Check electrical connections regularly if using an electric model.
- Store in a dry place when not in use, especially solar models that may be affected by moisture.
Conclusion
Building your own food dehydrator can be a rewarding project that not only saves money but also allows you to enjoy healthy snacks year-round. Whether you opt for an electric model or harness solar power, understanding the principles behind dehydration will help you create an efficient unit tailored to your needs. With proper maintenance and creativity in using dried foods, you can enhance your culinary repertoire while preserving seasonal produce effectively.

FAQ
1. What foods can I dehydrate?
You can dehydrate fruits, vegetables, herbs, and meats like jerky.
2. How long does it take to dehydrate food?
Drying times vary based on food type and thickness but generally range from several hours to over a day.
3. Can I use my oven as a dehydrator?
Yes, setting your oven on low heat can mimic dehydration but may not be as efficient as using a dedicated dehydrator.
4. How do I store dehydrated foods?
Store dried foods in airtight containers in a cool, dark place for optimal shelf life.
5. Is it safe to dehydrate meat?
Yes, as long as you follow proper safety guidelines such as pre-cooking and ensuring thorough drying.
Citations:
[1] https://backyard-farmer.com/diy-food-dehydrator-a-sustainable-guide-for-homemade-food-preservation/
[2] https://www.backwoodshome.com/build-a-passive-solar-food-dehydrator/
[3] https://www.youtube.com/watch?v=F-Cge4qSOms
[4] https://create.vista.com/photos/dehydrator/
[5] https://www.youtube.com/watch?v=mtDzdYoyeR8
[6] https://www.subcriticalflow.com/2021/11/a-simple-dehydrator-build-with.html
[7] https://www.gardeningknowhow.com/garden-how-to/info/diy-food-dehydrator.htm
[8] https://www.freepik.com/free-photos-vectors/food-dehydrator
[9] https://www.youtube.com/watch?v=rR2G5UO-5Ms
[10] https://www.youtube.com/watch?v=Z0f0jew8Whw


