Content Menu
● Understanding the Basics of Food Dehydration
>> The Science Behind Dehydration
● Benefits of Building Your Own Dehydrator
● Materials Needed
>> Additional Optional Materials
● Tools Required
● Step-by-Step Guide to Building Your Dehydrator
>> Step 1: Planning Your Design
>> Step 2: Cutting the Wood Panels
>> Step 3: Assembling the Box
>> Step 4: Installing Light Fixtures
>> Step 5: Adding Airflow Mechanisms
>> Step 6: Creating Shelves
>> Step 7: Final Assembly and Testing
● Operating Your Dehydrator
>> Preparing Food for Dehydration
>> Loading Your Dehydrator
>> Monitoring Temperature and Time
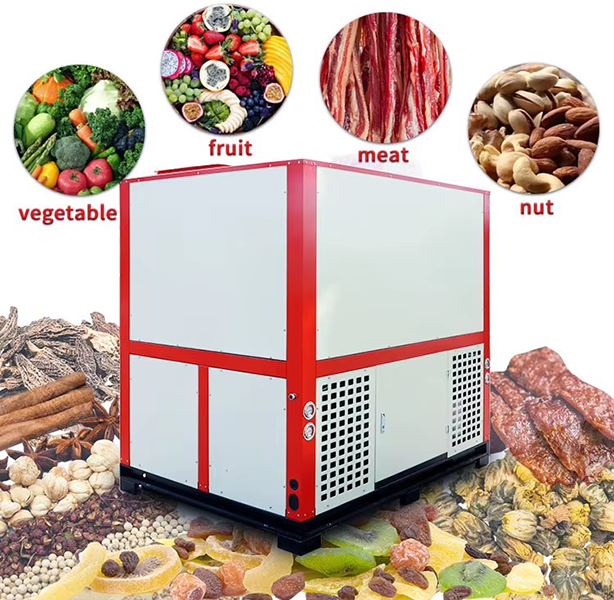
● Common Foods Suitable for Dehydration
● Storing Dried Foods Properly
● Maintenance Tips for Your Dehydrator
● Troubleshooting Common Issues
● Conclusion
● FAQ
>> 1. What types of foods can I dehydrate?
>> 2. How long does it take to dehydrate food?
>> 3. Can I use my dehydrator indoors?
>> 4. What temperature should I set my dehydrator?
>> 5. How do I know when my food is fully dehydrated?
Building a large food dehydrator can be a rewarding project that allows you to preserve fruits, vegetables, herbs, and even meats. This guide will walk you through the steps needed to create a functional and efficient dehydrator tailored to your needs.
Understanding the Basics of Food Dehydration
Food dehydration is a method of preserving food by removing moisture, which inhibits the growth of bacteria, yeast, and molds. Dehydrated foods are lightweight, shelf-stable, and can retain most of their nutritional value. The process involves applying heat and airflow to reduce the moisture content in food items.
The Science Behind Dehydration
Dehydration works by using heat to evaporate water from food. When moisture is removed, the concentration of sugars and flavors increases, enhancing the taste. Additionally, dehydrated foods can last for months or even years if stored properly.
Benefits of Building Your Own Dehydrator
- Cost-Effective: Building your own dehydrator can save you money compared to purchasing commercial models.
- Customization: You can design the dehydrator according to your specific needs regarding size, capacity, and functionality.
- Sustainability: Using recycled materials or energy-efficient designs can make your dehydrator more environmentally friendly.
- Quality Control: By making your own dehydrator, you have control over the materials used and can avoid harmful chemicals often found in commercially produced dehydrators.
Materials Needed
To build a large food dehydrator, you will need the following materials:
- Plywood (preferably 3/4 inch thick)
- Metal racks for drying trays
- Light sockets and bulbs (100W recommended)
- Electrical wiring (12-gauge wire)
- A small fan for air circulation
- Hinges and closing mechanisms for the door
- Screws and wood glue

Additional Optional Materials
- Thermostat: For better temperature control.
- Insulation material: To maintain consistent internal temperatures.
- Ventilation grilles: To enhance airflow further.
Tools Required
- Circular saw or table saw
- Power drill
- Wire cutters
- Screwdriver
- Measuring tape
- Safety goggles
Step-by-Step Guide to Building Your Dehydrator
Step 1: Planning Your Design
Before you start building, sketch out your design. Consider dimensions based on the space available and how much food you plan to dehydrate at once. A typical large dehydrator might measure around 2 feet wide by 3 feet tall.
Step 2: Cutting the Wood Panels
Using your circular saw, cut the plywood into panels for the sides, top, bottom, and shelves. For example:
- Two side panels (2 ft x 3 ft)
- One back panel (2 ft x 3 ft)
- One front panel with a door (2 ft x 3 ft)
- One bottom panel (2 ft x 1.5 ft)
- Shelves (cut to fit inside)
Step 3: Assembling the Box
Assemble the box using screws or wood glue. Ensure that all panels are securely fastened together. You may want to drill holes in the bottom for ventilation.
Step 4: Installing Light Fixtures
Drill a hole in the bottom panel for electrical wiring. Install light sockets inside the dehydrator at the bottom. Use 100W bulbs for adequate heat.
Step 5: Adding Airflow Mechanisms
Install a small fan at the top of the dehydrator to circulate hot air evenly across the trays. This will help ensure consistent drying.
Step 6: Creating Shelves
Install metal racks as shelves inside your dehydrator. Space them about 6 inches apart to allow for airflow around the food.
Step 7: Final Assembly and Testing
Attach the front door using hinges and add a closing mechanism. Once assembled, test your dehydrator by running it empty with the light on for several hours to ensure it reaches adequate temperatures (around 125°F).
Operating Your Dehydrator
Once your dehydrator is built, it's time to start using it effectively.
Preparing Food for Dehydration
1. Cleaning: Wash fruits and vegetables thoroughly.
2. Cutting: Slice food into uniform pieces; this ensures even drying.
3. Blanching: For some vegetables, blanching before dehydration helps preserve color and nutrients.
4. Pre-treating Fruits: Soaking fruits in lemon juice or ascorbic acid can prevent browning.
Loading Your Dehydrator
Place food on metal racks in a single layer without overlapping pieces to allow proper air circulation. Avoid overcrowding as this can lead to uneven drying.
Monitoring Temperature and Time
Set your dehydrator's temperature based on what you're drying:
- Fruits: 135°F - 145°F
- Vegetables: 125°F - 135°F
- Herbs: 95°F - 115°F
- Jerky: 155°F - 160°F
Drying times will vary based on humidity levels, thickness of slices, and type of food being dried. Regularly check progress during dehydration.
Common Foods Suitable for Dehydration
Certain foods are particularly well-suited for dehydration:
- Fruits such as apples, bananas, strawberries, peaches, and tomatoes retain flavor well when dried.
- Vegetables like bell peppers, carrots, zucchini, and mushrooms dehydrate effectively while preserving their nutrients.
- Herbs, including basil, oregano, thyme, and parsley are perfect candidates for dehydration as they concentrate flavors when dried.
- Meats, when prepared correctly (such as jerky), can be safely dried and stored for long periods.
Storing Dried Foods Properly
After dehydration is complete, proper storage is crucial to maintain quality:
1. Cool Down: Allow dried foods to cool completely before packaging them.
2. Airtight Containers: Store dried foods in glass jars or vacuum-sealed bags to keep out moisture.
3. Dark Storage Locations: Keep stored dried foods in a cool, dark place away from sunlight which can degrade quality over time.
4. Labeling: Always label containers with dates so you know when they were dried; use older items first.
Maintenance Tips for Your Dehydrator
Regular maintenance will ensure longevity:
- Regularly clean all surfaces before and after use.
- Ensure that all electrical components are functioning properly.
- Store dried foods in airtight containers to maintain freshness.
Troubleshooting Common Issues
1. Uneven Drying: This may occur if food is overcrowded or if there is insufficient airflow. Make sure trays are not stacked too closely together.
2. Overheating: If temperatures exceed recommended levels, check that bulbs are not too powerful for your design or consider adding more ventilation holes.
3. Food Spoilage: If dried foods spoil quickly after storage, they may not have been dried thoroughly or stored properly in airtight containers.
Conclusion
Building a large food dehydrator is not only practical but also an enjoyable DIY project that can yield delicious results. With careful planning and execution, you can create a device that meets your needs for preserving food effectively while enjoying homemade snacks year-round.

FAQ
1. What types of foods can I dehydrate?
You can dehydrate fruits, vegetables, herbs, meats (like jerky), and even flowers for teas or culinary uses.
2. How long does it take to dehydrate food?
Dehydration times vary based on food type and thickness but typically range from several hours to over a day.
3. Can I use my dehydrator indoors?
Yes, as long as there is adequate ventilation and it's not placed near flammable materials due to heat generation.
4. What temperature should I set my dehydrator?
Most foods dehydrate well between 125°F to 160°F; however, specific temperatures may vary depending on what you are drying.
5. How do I know when my food is fully dehydrated?
Food should be dry but still flexible; it should not feel sticky or moist when finished.


