Content Menu
● Understanding Solar Food Dehydration
>> Benefits of Solar Dehydration
● Types of Solar Dehydrators
● Materials Needed
● Step-by-Step Construction Guide
>> 1. Designing Your Dehydrator
>> 2. Building the Solar Collector
>> 3. Constructing the Drying Chamber
>> 4. Assembly
>> 5. Adding Final Touches
● Operating Your Solar Dehydrator
● Types of Foods Suitable for Solar Dehydration
● Maintenance Tips
● Troubleshooting Common Issues
● Conclusion
● FAQ
>> 1. What types of foods can I dehydrate using a solar dehydrator?
>> 2. How long does it take to dehydrate food using a solar dehydrator?
>> 3. Can I use my solar dehydrator during cloudy days?
>> 4. How do I know when my food is fully dehydrated?
>> 5. Is it safe to dehydrate meat in a solar dehydrator?
● Citations:
Food dehydration is a time-honored method of preservation that allows you to enjoy your favorite fruits, vegetables, and herbs long after their harvest season. Among the various methods of food dehydration, solar food dehydrators stand out for their simplicity, cost-effectiveness, and environmentally friendly approach. This article will guide you through the entire process of building your own solar food dehydrator, ensuring you have all the necessary information to create a functional and efficient device.
Understanding Solar Food Dehydration
Solar food dehydrators use the sun's energy to heat air, which then circulates around the food items placed inside. The warm air absorbs moisture from the food, effectively drying it out. This method not only preserves the food but also retains most of its nutritional value compared to other preservation methods like canning or freezing.
Benefits of Solar Dehydration
- Energy Efficiency: Utilizes renewable solar energy.
- Cost-Effective: Requires minimal investment in materials.
- Nutritional Retention: Preserves vitamins and minerals better than cooking methods.
- Simplicity: Easy to construct with basic materials and tools.
Types of Solar Dehydrators
Solar dehydrators can be classified into two main categories: passive and active solar dehydrators.
- Passive Solar Dehydrator: This type relies solely on the sun's energy without any mechanical assistance. It consists of a collector box with a transparent cover that traps heat. The interior is painted black to absorb maximum sunlight, and air vents allow moisture-laden air to escape.
- Active Solar Dehydrator: This model incorporates fans or other mechanisms to enhance airflow and heat distribution, resulting in faster drying times. Active systems can be more complex and expensive but often yield better results.
Materials Needed
To build a solar food dehydrator, you'll need a variety of materials. Here's a comprehensive list:
- Wood: Plywood or untreated lumber for the frame.
- Clear Plastic or Glass: For the top of the solar collector to allow sunlight in.
- Black Paint: To coat the interior surfaces for better heat absorption.
- Screening Material: Food-safe mesh for drying trays.
- Hinges: For doors or access points.
- Screws and Nails: For assembly.
- Thermometer: To monitor internal temperatures.

Step-by-Step Construction Guide
1. Designing Your Dehydrator
Start by sketching a design for your dehydrator. A simple model consists of two main components: the solar collector and the drying chamber.
2. Building the Solar Collector
The solar collector is where sunlight enters and heats the air. Here's how to construct it:
- Cut a piece of plywood to form a box approximately 4 feet long, 2 feet wide, and 1 foot deep.
- Paint the interior surfaces black to maximize heat absorption.
- Attach clear plastic or glass on top to create a greenhouse effect.
- Ensure there are vents at both ends for air circulation.
3. Constructing the Drying Chamber
The drying chamber is where you place your food items:
- Construct another wooden box that fits snugly on top of the solar collector.
- Inside, install multiple racks made from screening material to hold your food items.
- Ensure there is enough space between racks for air circulation.
4. Assembly
Once both parts are ready:
- Position the solar collector at an angle facing south (in the Northern Hemisphere) to capture maximum sunlight.
- Securely attach the drying chamber on top of the solar collector.
5. Adding Final Touches
Install hinges on one side of the drying chamber for easy access. Place a thermometer inside to monitor temperature levels during operation.
Operating Your Solar Dehydrator
To use your dehydrator effectively:
1. Prepare Your Food: Wash and slice fruits or vegetables into uniform sizes for even drying.
2. Place Food in Trays: Arrange your prepared food on the screens inside the drying chamber without overcrowding.
3. Monitor Temperature: Aim for temperatures between 120°F and 140°F for optimal dehydration.
4. Adjust Orientation: If necessary, adjust the angle of your dehydrator throughout the day to follow the sun.
5. Check Progress: Depending on humidity levels and sunlight availability, check your food every few hours until it reaches desired dryness.
Types of Foods Suitable for Solar Dehydration
Not all foods dehydrate equally well; some are more suited for this method than others:
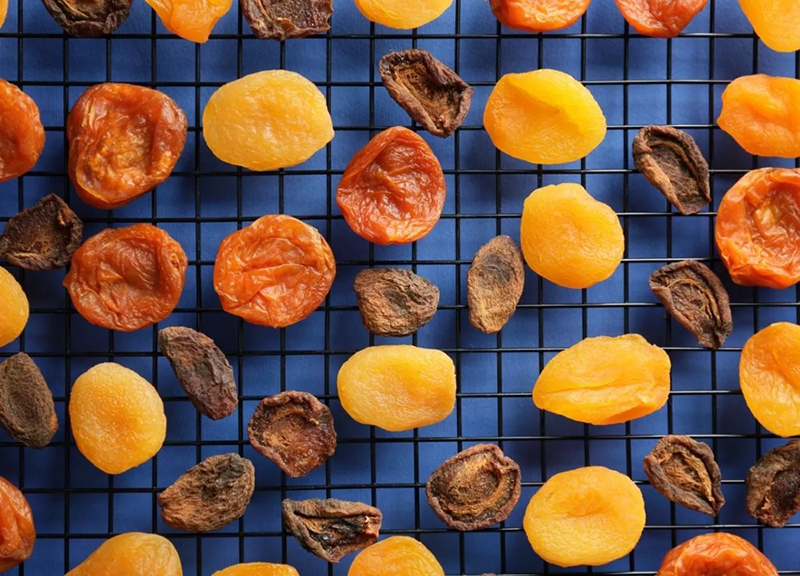
- Fruits: Apples, bananas, peaches, apricots, tomatoes (especially for sun-dried tomatoes).
- Vegetables: Carrots, bell peppers, zucchini, mushrooms.
- Herbs: Basil, oregano, thyme (use lower temperatures to prevent bleaching).
- Meats: Jerky can be made if properly marinated and dried at safe temperatures.
Maintenance Tips
To ensure longevity and efficiency:
- Regularly clean all surfaces and trays to prevent mold growth.
- Inspect seals and joints for air leaks; use caulk if necessary.
- Store dehydrated foods in airtight containers away from light and moisture.
Troubleshooting Common Issues
While using a solar dehydrator is generally straightforward, you may encounter some common problems:
1. Inconsistent Drying: This can occur if trays are overcrowded or if there isn't enough airflow. Make sure food is arranged in a single layer with space between pieces.
2. Mold Growth: If humidity levels are too high or if food is not dried thoroughly before storage, mold can develop. Ensure proper drying times and store in cool, dry places.
3. Temperature Control: If temperatures exceed recommended levels (above 140°F), consider adding vents or using fans to regulate heat.
4. Pests: Insects can be attracted to exposed food; use screens or cloth covers during drying.
Conclusion
Building a solar food dehydrator is an excellent project that combines sustainability with practicality. Not only does it allow you to preserve seasonal produce, but it also promotes self-sufficiency and reduces reliance on electric appliances. With minimal investment and effort, you can create a tool that provides delicious dried foods year-round while contributing positively to environmental conservation.

FAQ
1. What types of foods can I dehydrate using a solar dehydrator?
You can dehydrate fruits (like apples, bananas), vegetables (such as tomatoes, peppers), herbs (like basil, thyme), and even meats (if properly prepared).
2. How long does it take to dehydrate food using a solar dehydrator?
Dehydration time varies based on temperature, humidity, and type of food but typically ranges from 6 to 12 hours.
3. Can I use my solar dehydrator during cloudy days?
Yes, while sunny days are ideal for dehydration, you can still achieve some results on overcast days; however, it will take longer.
4. How do I know when my food is fully dehydrated?
Your food should be dry but still pliable; it should not feel sticky or moist when touched.
5. Is it safe to dehydrate meat in a solar dehydrator?
Yes, but ensure that meat is marinated or seasoned properly beforehand and reach safe internal temperatures during drying to prevent bacterial growth.
Citations:
[1] https://www.arkaenergy.com/learn/solar-dehydrator
[2] https://homesteadhow-to.com/solar-dehydration/
[3] https://www.motherearthnews.com/diy/solar-food-dehydrator-zmaz06aszraw/
[4] https://learn.eartheasy.com/articles/solar-food-dehydration-how-to-sun-dry-your-food/
[5] https://permacultureplants.com/solar-dehydrator/
[6] https://extension.okstate.edu/fact-sheets/solar-dehydrator-construction-plans.html
[7] https://www.youtube.com/watch?v=Ny6tGbu2nQ0
[8] https://www.solarbrother.com/en/blog/all-you-need-to-know-about-solar-dryers/
[9] https://www.mdpi.com/2673-9941/2/4/29
[10] https://royalangkor.ca/solar-food-dehydrator/


