Content Menu
● Understanding Food Dehydrators
● Benefits of Using a Food Dehydrator
● Preparing Your Herbs
● Drying Process
● How to Tell When Herbs Are Done
● Cooling and Storing Dried Herbs
● Tips for Successful Herb Drying
● Common Mistakes When Using a Food Dehydrator
● Advanced Techniques for Herb Preservation
>> Infusing Oils with Dried Herbs
>> Creating Herb Blends
>> Using Dried Herbs in Cooking
● Troubleshooting Common Dehydrating Issues
>> Uneven Drying
>> Slow Drying Times
>> Food Spoilage Post-Drying
● Conclusion
● FAQ
>> 1. What types of herbs are best for drying in a food dehydrator?
>> 2. How long does it take to dry herbs in a food dehydrator?
>> 3. Can I dry different types of herbs at the same time?
>> 4. Do I need to wash my herbs before drying them?
>> 5. How should I store dried herbs?
● Citations:
Drying herbs is an excellent way to preserve their flavor and nutritional value for long-term storage. Using a food dehydrator makes the process efficient and straightforward, allowing you to enjoy your homegrown herbs throughout the year. This guide will walk you through the steps of drying herbs using a food dehydrator, providing tips and tricks for optimal results.

Understanding Food Dehydrators
A food dehydrator is a kitchen appliance designed to remove moisture from food, thereby extending its shelf life. By applying low heat and circulating air, dehydrators effectively dry out herbs while retaining their essential oils, flavors, and nutrients.
- Temperature Control: Most dehydrators allow you to set specific temperatures, which is crucial for drying herbs without compromising their quality. The ideal temperature range for drying herbs is between 95°F (35°C) and 115°F (46°C).
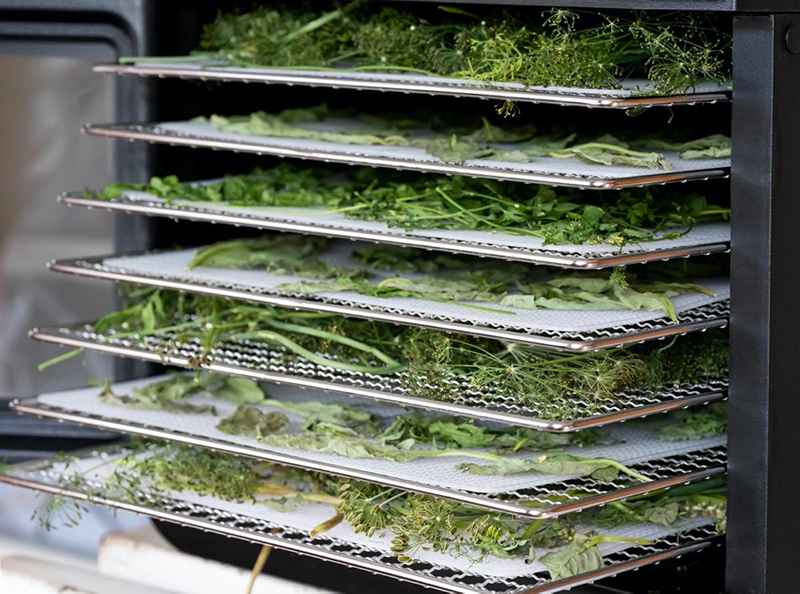
- Airflow: Proper airflow is essential as it ensures even drying. Many dehydrators come with multiple trays that can be stacked, allowing you to dry various herbs simultaneously without mixing their flavors.
Benefits of Using a Food Dehydrator
- Preservation of Flavor and Nutrients: Dehydrating at low temperatures preserves the flavor and nutritional content of herbs better than other methods like air drying or oven drying.
- Speed: Herbs can be dried in a matter of hours rather than days, making it a quick solution for preserving your harvest.
- Space Efficiency: Unlike air drying, which requires ample space and good air circulation, using a dehydrator requires minimal counter space.
Preparing Your Herbs
Before you begin the drying process, it's important to prepare your herbs properly:
1. Harvesting: Pick fresh herbs in the morning after the dew has evaporated but before the sun is too hot. This timing helps retain their essential oils.
2. Cleaning: Rinse the herbs gently under cool water to remove any dirt or insects. Shake off excess moisture or use a salad spinner to dry them thoroughly.
3. Trimming: Remove thick stems and any damaged leaves. For larger-leaved herbs like basil or sage, strip the leaves from the stems; smaller-leaved herbs like thyme can be dried whole.
4. Arranging: Lay the prepared herbs in a single layer on the dehydrator trays. Avoid overcrowding to ensure proper airflow around each herb.
Drying Process
Once your herbs are prepared and arranged on the trays, follow these steps:
1. Set Temperature: Preheat your dehydrator to between 95°F (35°C) and 115°F (46°C). If you live in a humid climate, consider setting it slightly higher.
2. Drying Time: The time required for drying varies based on the type of herb:
- Delicate herbs like basil and parsley usually take about 1-4 hours.
- Sturdier herbs like rosemary may take longer.
- Check periodically for dryness; herbs are ready when they crumble easily between your fingers.
3. Rotate Trays: If your dehydrator has multiple trays, rotate them halfway through the drying process to ensure even drying.

How to Tell When Herbs Are Done
To check if your herbs are fully dried:
- Rub a leaf between your fingers; it should crumble easily.
- Stems should snap rather than bend when bent.
Cooling and Storing Dried Herbs
After removing the dried herbs from the dehydrator:
1. Cooling: Allow them to cool completely on a clean surface. This step prevents condensation from forming in storage containers.
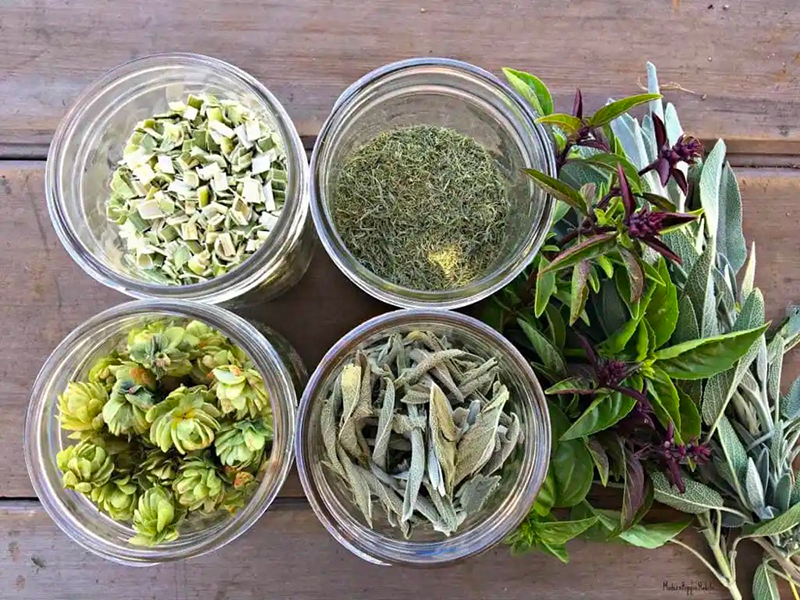
2. Storage: Store dried herbs in airtight containers away from light and heat sources. Glass jars or vacuum-sealed bags work well for long-term storage.
3. Labeling: Clearly label containers with the herb name and date of drying for easy identification later on.
Tips for Successful Herb Drying
To ensure that your herb drying process is successful, consider these additional tips:
- Dehydrate Like Items Together: Always dehydrate items that require similar temperatures together in one batch to avoid uneven drying [1].
- Cut Uniformly: If you are drying larger pieces or stems, ensure they are cut into uniform sizes to promote even drying [4].
- Avoid Overcrowding: Spread your herbs out on the trays without overlapping them; this allows air to circulate freely around each piece [6].
- Use Non-Stick Trays: For sticky items or fruit leathers, consider using non-stick sheets or lightly spraying trays with cooking spray to make cleanup easier [1].
- Monitor Humidity Levels: In humid environments, consider using a dehumidifier in the room where you are dehydrating to enhance efficiency [2].
Common Mistakes When Using a Food Dehydrator
While using a food dehydrator is generally straightforward, some common mistakes can hinder your results:
- Incorrect Temperature Settings: Using too high a temperature can cook rather than dehydrate your herbs, leading to loss of flavor and nutrients [8].
- Not Checking Progress Regularly: It's important to check on your herbs periodically during dehydration to prevent over-drying or uneven results [5].
- Improper Storage After Drying: If dried herbs are stored improperly—such as in non-air-tight containers—they can absorb moisture from the air and spoil [7].
Advanced Techniques for Herb Preservation
While basic dehydration is effective for most home cooks, there are advanced techniques that can further enhance both flavor retention and usability:
Infusing Oils with Dried Herbs
One creative way to utilize dried herbs is by infusing them into oils:
1. Select high-quality olive oil or another neutral oil.
2. Place dried herbs into a clean glass jar.
3. Pour oil over the dried herbs until fully submerged.
4. Seal tightly and store in a cool dark place for 2-4 weeks.
5. Strain out the solids before use; this infused oil can elevate dressings or marinades with concentrated flavors.
Creating Herb Blends
Mixing various dried herbs into blends can create unique seasonings perfect for different cuisines:
- Italian Blend: Combine equal parts dried basil, oregano, thyme, and rosemary.
- Mexican Blend: Mix dried cilantro with oregano and chili powder for an aromatic seasoning mix suitable for tacos or salsas.
- Mediterranean Blend: Combine sun-dried tomatoes with oregano, thyme, basil, garlic powder, and salt for an all-purpose seasoning perfect for roasted vegetables or meats.
Using Dried Herbs in Cooking
Dried herbs differ from fresh ones in terms of potency; thus adjustments may be needed when substituting them in recipes:
- Use one-third of the amount when substituting dried for fresh (e.g., if a recipe calls for 1 tablespoon of fresh basil, use about 1 teaspoon of dried basil).
- Add dried herbs early in cooking processes such as soups or stews where they have time to rehydrate fully; add towards the end when using in salads or dressings where they need less cooking time.
Troubleshooting Common Dehydrating Issues
Even seasoned users may encounter challenges while using their food dehydrators:
Uneven Drying
This issue often arises due to improper airflow or overcrowding:
- Ensure there's enough space between items on trays.
- Rotate trays during dehydration cycles if you notice some areas are drying faster than others [2].
Slow Drying Times
If your dehydration process seems unusually slow:
- Check if humidity levels are high; consider running a dehumidifier nearby.
- Ensure that pieces aren't too thick; thinner slices will dry faster [3].
Food Spoilage Post-Drying
To prevent spoilage after dehydration:
- Store only fully dried foods; sticky surfaces indicate incomplete dehydration.
- Use airtight containers immediately after cooling down completely [7].
Conclusion
Drying herbs in a food dehydrator is an effective way to preserve their flavor and nutritional value for long-term storage. By following these steps—preparing your herbs correctly, setting the right temperature, monitoring drying times, and storing them properly—you can enjoy home-dried herbs that enhance your culinary creations year-round.

FAQ
1. What types of herbs are best for drying in a food dehydrator?
Most culinary herbs such as basil, oregano, thyme, rosemary, and parsley dry well in a food dehydrator due to their moisture content and flavor profiles.
2. How long does it take to dry herbs in a food dehydrator?
The drying time varies depending on the type of herb but generally ranges from 1 to 4 hours at temperatures between 95°F (35°C) and 115°F (46°C).
3. Can I dry different types of herbs at the same time?
Yes, you can dry different types of herbs simultaneously as long as they have similar drying times; however, keep track of which trays contain which herbs.
4. Do I need to wash my herbs before drying them?
Yes, it's important to wash fresh herbs gently under cool water to remove dirt or insects before drying them.
5. How should I store dried herbs?
Store dried herbs in airtight containers away from light and heat sources to maintain their flavor and potency over time.
Citations:
[1] https://www.cnet.com/pictures/tips-for-using-your-new-dehydrator/
[2] https://royalangkor.ca/commercial-food-dehydrator/
[3] https://www.treelinereview.com/gearreviews/best-food-dehydrator
[4] https://www.backpackingchef.com/dehydrating-food.html
[5] https://www.youtube.com/watch?v=SwELNvW5YSo
[6] https://www.thespruceeats.com/best-food-dehydrators-4077285
[7] https://learn.eartheasy.com/guides/a-beginners-guide-to-dehydrating-food/
[8] https://www.linkedin.com/pulse/common-questions-food-dehydrators-aradmachinery


