Content Menu
● Understanding Food Dehydration
>> Benefits of Dehydrating Food
● Materials Needed
● Basic Designs for DIY Food Dehydrators
>> 1. Cardboard Box Dehydrator
>> 2. Wooden Frame Dehydrator
>> 3. Solar Food Dehydrator
● How To Use Your DIY Food Dehydrator
● Tips for Successful Dehydration
● Common Foods Suitable for Dehydration
● Foods Not Recommended for Dehydration
● Dehydration Techniques
● Conclusion
● FAQ
>> 1. What foods can I dehydrate?
>> 2. How long does it take to dehydrate food?
>> 3. Can I use my oven instead of a dehydrator?
>> 4. How do I know when my food is fully dehydrated?
>> 5. How should I store dehydrated foods?
● Citations:
Dehydrating food is an age-old preservation method that allows you to enjoy fruits, vegetables, and even meats long after their harvest. With the right tools, you can create your own food dehydrator. This guide will walk you through the process of making a DIY food dehydrator, highlighting various methods, materials, and tips to ensure your dehydrated foods turn out perfectly.

Understanding Food Dehydration
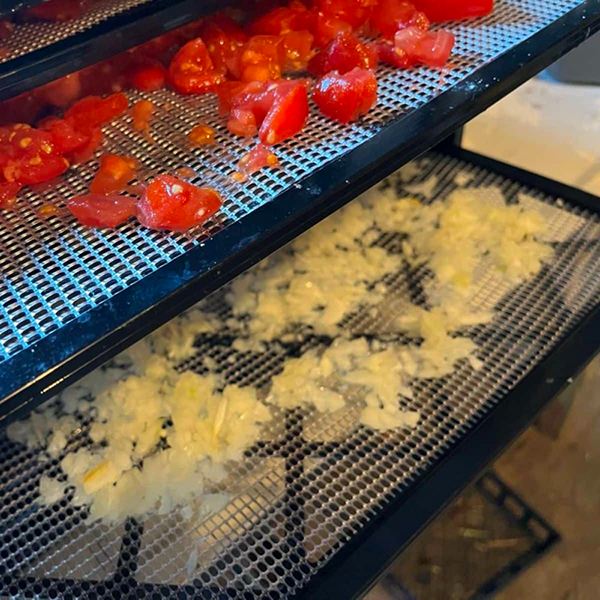
Food dehydration is the process of removing moisture from food to inhibit the growth of bacteria, yeasts, and molds. By lowering the water content, you extend the shelf life of your food while retaining most of its nutrients and flavors.
Benefits of Dehydrating Food
- Preservation: Dehydrated foods can last for months or even years when stored properly.
- Nutritional Retention: Dehydration helps maintain vitamins and minerals found in fresh produce.
- Convenience: Dried foods are lightweight and easy to store, making them perfect for camping or hiking.
- Cost-Effective: Making your own dehydrated snacks can save money compared to store-bought options.
Materials Needed
To build a simple DIY food dehydrator, you will need:
- Container: An old cabinet, cardboard box, or wooden frame.
- Shelving: Wire racks or mesh screens to hold the food.
- Heat Source: A light bulb (60 watts or more) or a small heating element.
- Fan: A small electric fan to circulate air.
- Insulation Material: Aluminum foil or dark paint to help retain heat.
- Tools: Drill, screws, tape, scissors, and possibly a saw.
Basic Designs for DIY Food Dehydrators
1. Cardboard Box Dehydrator
One of the simplest designs involves using a cardboard box lined with aluminum foil.
- Step 1: Cut a cardboard box to your desired size.
- Step 2: Line the inside with aluminum foil to reflect heat.
- Step 3: Cut holes in the sides for ventilation and place wire racks inside.
- Step 4: Install a light bulb at the bottom of the box as a heat source.
- Step 5: Place a small fan at one end to promote airflow.
2. Wooden Frame Dehydrator
For a more durable option, consider building a wooden frame dehydrator.
- Step 1: Construct a rectangular frame using wood planks.
- Step 2: Attach mesh screens on all sides for airflow.
- Step 3: Install a light bulb or heating element at the bottom.
- Step 4: Ensure there are ventilation holes at the top for moisture escape.
3. Solar Food Dehydrator
Harnessing solar energy is an eco-friendly way to dehydrate food.
- Step 1: Build a box with clear glass or plastic on top to trap heat.
- Step 2: Use dark-painted surfaces inside to absorb sunlight effectively.
- Step 3: Create airflow with holes at the top and bottom of the box.
How To Use Your DIY Food Dehydrator
Once your dehydrator is built, follow these steps for successful dehydration:
1. Prepare Your Food:
- Wash and slice fruits or vegetables into uniform pieces for even drying.
- Blanch vegetables if necessary to preserve color and nutrients.
2. Load the Dehydrator:
- Arrange food slices on the racks without overcrowding them.
- Ensure good air circulation around each piece.
3. Set Temperature and Time:
- Aim for temperatures between 125°F (52°C) and 135°F (57°C) for fruits and vegetables.
- For meats like jerky, higher temperatures (around 160°F or 71°C) are recommended.
4. Monitor Progress:
- Check periodically for dryness; fruits should be leathery but pliable, while vegetables should be brittle.
- Rotate trays if necessary to ensure even drying.
5. Store Properly:
- Once dried, allow foods to cool before storing them in airtight containers.
- Keep in a cool, dark place for maximum shelf life.

Tips for Successful Dehydration
- Use a thermometer to monitor internal temperatures accurately.
- Consider adding a small fan if airflow is insufficient; this helps reduce drying time and prevents mold growth.
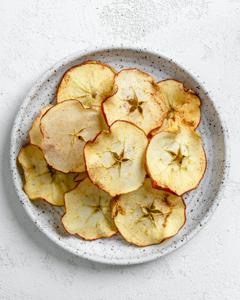
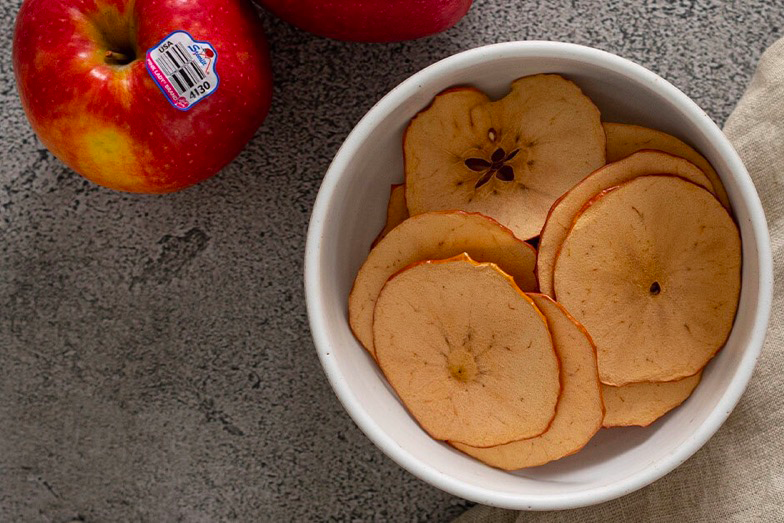
- Experiment with different foods; not all items dehydrate equally well. Fruits like apples and bananas work great, while leafy greens can become crispy snacks.
Common Foods Suitable for Dehydration
Dehydrating various foods can provide you with an array of snacks and ingredients. Here's a list of common items that dehydrate well:
- Fruits:
- Apples
- Bananas
- Apricots
- Strawberries
- Mangoes
- Vegetables:
- Carrots
- Zucchini
- Bell peppers
- Tomatoes
- Mushrooms
- Herbs:
- Basil
- Oregano
- Thyme
- Rosemary
- Meats (for jerky):
- Beef
- Chicken
- Turkey
Foods Not Recommended for Dehydration
While many foods can be dehydrated successfully, some should be avoided due to their high moisture content or fat levels:
- High-moisture fruits like melons and citrus fruits do not dehydrate well.
- Foods high in fat (like avocados) can become rancid during storage after dehydration.
Dehydration Techniques
There are several methods often used to dehydrate foods:
1. Sun Drying
- Effective in hot climates with low humidity.
- Takes several days but enhances flavor naturally.
2. Air Drying
- Similar to sun drying but done in shaded areas.
- Best for herbs and delicate greens.
3. Oven Drying
- Set your oven on low heat (around $$140°F$$ or $$60°C$$).
- Keep the door slightly ajar for airflow; check frequently.
4. Electric Dehydrators
- Most efficient method with controlled temperature and airflow.
- Allows multiple types of food to be dried simultaneously without cross-contamination risks.
5. Solar Drying
- Uses solar energy; ideal for eco-friendly enthusiasts.
- Requires sunny weather conditions but no electricity needed.
Conclusion
Creating your own DIY food dehydrator is not only cost-effective but also allows you to enjoy healthy snacks year-round. Whether you choose a simple cardboard design or a more sophisticated wooden frame, you can successfully preserve your favorite fruits and vegetables with just a few materials and some creativity.
By following this guide on how to make a food dehydrator, you can explore new recipes and enjoy delicious dried snacks that are perfect for any occasion! With practice and experimentation, you'll master the art of dehydration and discover endless possibilities in preserving your favorite foods!

FAQ
1. What foods can I dehydrate?
You can dehydrate fruits (like apples, bananas), vegetables (like tomatoes, peppers), herbs (like basil), and meats (like beef jerky).
2. How long does it take to dehydrate food?
Dehydration times vary based on the type of food and thickness of slices but generally range from $$6$$ to $$12$$ hours at appropriate temperatures.
3. Can I use my oven instead of a dehydrator?
Yes! You can use an oven set to low temperatures (around $$140°F$$ or $$60°C$$) as an alternative method for dehydrating foods.
4. How do I know when my food is fully dehydrated?
Fruits should be leathery but still flexible; vegetables should be brittle. Test pieces by letting them cool; they should not feel sticky or moist.
5. How should I store dehydrated foods?
Store dehydrated foods in airtight containers in a cool, dark place. Vacuum sealing can further extend shelf life.
Citations:
[1] https://eatsleepwild.com/homemade-dehydrated-backpacking-meals/
[2] https://www.subcriticalflow.com/2021/11/a-simple-dehydrator-build-with.html
[3] https://homesteadingfamily.com/preservation-101-intro-to-dehydrating-food/
[4] https://remixsnacks.ca/blogs/remix-blog/from-sun-dried-to-freeze-dried-a-look-at-different-dehydration-methods
[5] https://www.campkitchen.ca/blog/dehydrating-basics
[6] https://www.gardeningknowhow.com/garden-how-to/info/diy-food-dehydrator.htm
[7] https://www.cnet.com/pictures/tips-for-using-your-new-dehydrator/
[8] https://www.healthline.com/nutrition/dehydrated-food
[9] https://www.backpackingchef.com/dehydrating-food.html
[10] https://learn.eartheasy.com/guides/a-beginners-guide-to-dehydrating-food/


