Content Menu
● Understanding Food Dehydrators
● Choosing the Right Meat
● Preparing Your Jerky
>> 1. Slicing the Meat
>> 2. Marinating the Meat
>> 3. Draining and Drying
● Dehydrating Your Jerky
>> Step-by-Step Instructions:
● Enjoying Your Jerky
● Tips for Successful Jerky Making
● Considerations When Using a Food Dehydrator
>> Selecting Your Dehydrator
>> Experimenting with Flavors
● Dehydrating Other Foods
● Conclusion
● FAQ
>> 1. How long does it take to make jerky in a dehydrator?
>> 2. Can I use other meats besides beef?
>> 3. What should I do if my jerky is too dry?
>> 4. Is homemade jerky healthier than store-bought?
>> 5. How should I store my homemade jerky?
● Citations:
Making jerky at home is an enjoyable and rewarding process, especially when using a food dehydrator. Not only does it allow you to control the ingredients, but it also can be more cost-effective than purchasing store-bought jerky. This guide will walk you through the steps of making delicious beef jerky in a food dehydrator, covering everything from selecting the right meat to storing your finished product.
Understanding Food Dehydrators
A food dehydrator is an essential tool for making jerky. It removes moisture from food at low temperatures, which helps preserve it while maintaining flavor and nutrients.
- How It Works: Food dehydrators use a fan and heating element to circulate warm air around the food, allowing moisture to evaporate.
- Benefits: Dehydrating food can extend its shelf life, reduce waste, and create healthy snacks without preservatives.
Choosing the Right Meat
The type of meat you choose is crucial for making jerky. Here are some popular options:
- Beef: The most common choice for jerky. Cuts like top round, bottom round, and flank steak are ideal due to their low fat content.
- Pork: Can be used but should be cooked thoroughly to ensure safety.
- Turkey: A lean alternative that works well for jerky.
- Venison: A flavorful option for those who hunt.
When selecting meat, look for cuts that are lean with minimal marbling. Fat does not dehydrate well and can lead to rancidity.
Preparing Your Jerky
1. Slicing the Meat
To achieve the best texture in your jerky, slice the meat properly:
- Thickness: Aim for strips that are about 1/8 inch thick. This thickness allows for even drying without becoming too tough.
- Direction: Slice against the grain of the meat. This shortens muscle fibers and results in a more tender jerky.
2. Marinating the Meat
Marinating adds flavor and helps tenderize the meat. Here's a simple marinade recipe:
- Ingredients:
- 2 lbs of thinly sliced beef
- 2/3 cup soy sauce
- 2/3 cup Worcestershire sauce
- 1 teaspoon liquid smoke
- 1 tablespoon smoked paprika
- 1 tablespoon brown sugar
- 2 teaspoons black pepper
- Optional spices: garlic powder, onion powder, cayenne pepper
- Instructions:
- Combine all marinade ingredients in a bowl.
- Place sliced meat in a ziplock bag or container and pour the marinade over it.
- Seal and refrigerate for at least 12 hours (up to 24 hours for more flavor).
3. Draining and Drying
After marinating, remove the meat from the marinade and pat it dry with paper towels to remove excess moisture. This step helps prevent steaming during dehydration.
Dehydrating Your Jerky
Step-by-Step Instructions:
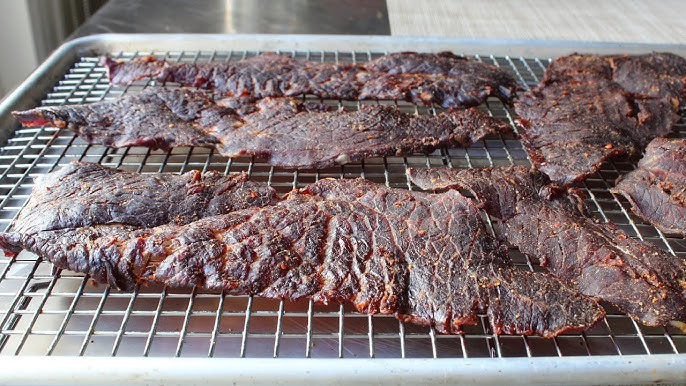
1. Arrange the Meat: Lay out the marinated strips on dehydrator trays in a single layer without overlapping. This ensures even airflow around each piece.
2. Set Temperature: Preheat your dehydrator to around 160°F (71°C). This temperature is safe for drying meat.
3. Dehydrate: Dry the meat for approximately 4 to 6 hours. Start checking for doneness at the four-hour mark:
- The jerky should bend slightly without breaking.
- If it snaps easily, it may be overdone.
4. Storage: Once dried, let the jerky cool before storing it in airtight containers or vacuum-sealed bags. Properly dried jerky can last up to one year if stored correctly.

Enjoying Your Jerky
Homemade jerky can be enjoyed as a snack on its own or used in various recipes such as salads or sandwiches.
Tips for Successful Jerky Making
To enhance your jerky-making experience, consider these additional tips:
- Use Lean Cuts: Always choose lean cuts of meat and trim any visible fat before slicing. Fat can go rancid during storage, affecting flavor and safety.
- Consistent Slicing: For even drying, ensure that all slices are of uniform thickness. A mandoline slicer can help achieve consistent cuts.
- Rotate Trays: If your dehydrator has multiple trays, rotate them during dehydration to ensure even drying since some areas may dry faster than others due to airflow variations[1][2].
- Check Moisture Levels: Before storing your jerky, break a piece open to check for moisture inside. If it's still moist, return it to the dehydrator until fully dried[7].
Considerations When Using a Food Dehydrator
When embarking on your journey of making homemade jerky or any other dehydrated foods, there are several key considerations that can enhance your results:
Selecting Your Dehydrator
Choosing the right food dehydrator is essential for achieving optimal results:
- Types of Dehydrators:
- Stackable: These often have multiple trays stacked vertically but may require rotating trays during use.
- Shelf: These models usually have horizontal airflow which allows for more even drying but tend to be pricier[6].
- Power & Capacity: Look for models with sufficient wattage (around 600 watts or more) that can handle larger batches if needed[3].
- Temperature Control: Ensure that your dehydrator has adjustable temperature settings; this allows you to dehydrate different types of foods effectively[4].
Experimenting with Flavors
Once you're comfortable with basic beef jerky recipes, consider experimenting with different flavors:
- Spicy Jerky: Add chili powder or hot sauce into your marinade for an extra kick.
- Sweet Jerky: Incorporate honey or maple syrup into your marinade for a sweet touch.
- Herbed Jerky: Add dried herbs such as rosemary or thyme into your marinade for an aromatic flavor profile[8].
Dehydrating Other Foods
While this guide focuses on making beef jerky, a food dehydrator can be used for various other foods:
- Fruits & Vegetables: Apples, bananas, tomatoes, carrots—most fruits and vegetables can be dried effectively.
- Herbs & Spices: Fresh herbs retain their flavor well when dehydrated; this is an excellent way to preserve seasonal herbs[10].
- Complete Meals: You can also dehydrate complete meals by cooking them first (like stews) and then drying them out[2].
Conclusion
Making jerky in a food dehydrator is an accessible process that yields delicious results. By following these steps—selecting quality meat, preparing a flavorful marinade, and properly dehydrating—you can create your own custom jerky at home.

FAQ
1. How long does it take to make jerky in a dehydrator?
It typically takes between 4 to 6 hours depending on the thickness of your slices and your dehydrator's settings.
2. Can I use other meats besides beef?
Yes! Pork, turkey, and venison are also great options for making jerky.
3. What should I do if my jerky is too dry?
If your jerky becomes overly dry, consider adjusting your drying time next batch or storing it with a slice of bread to soften it slightly.
4. Is homemade jerky healthier than store-bought?
Generally, yes! Homemade jerky allows you to control ingredients and avoid preservatives or excessive sodium often found in commercial products.
5. How should I store my homemade jerky?
Store your jerky in airtight containers or vacuum-sealed bags in a cool, dry place to maximize freshness and shelf life.
Citations:
[1] https://www.cnet.com/pictures/tips-for-using-your-new-dehydrator/
[2] https://www.backpackingchef.com/dehydrating-food.html
[3] https://www.treelinereview.com/gearreviews/best-food-dehydrator
[4] https://www.freshoffthegrid.com/dehydrating-food/
[5] https://www.hobbyfarms.com/5-fresh-foods-dry-in-the-dehydrator/
[6] https://www.thespruceeats.com/best-food-dehydrators-4077285
[7] https://westonbrands.com/weston-dehyrating-tips
[8] https://www.healthline.com/nutrition/dehydrated-food
[9] https://dehydratorreview.net/compare-dehydrators
[10] https://www.thepurposefulpantry.com/essential-dehydrated-foods-for-the-pantry/


