Content Menu
● Understanding Food Dehydration
>> Benefits of Food Dehydration
● Types of Food Dehydrators
● Materials Needed for a DIY Food Dehydrator
● Step-by-Step Guide to Building Your Own Food Dehydrator
>> Step 1: Prepare Your Box
>> Step 2: Install Shelving Racks
>> Step 3: Add Heat Source
>> Step 4: Install Fan
>> Step 5: Final Assembly
● Using Your DIY Food Dehydrator
● Tips for Successful Dehydration
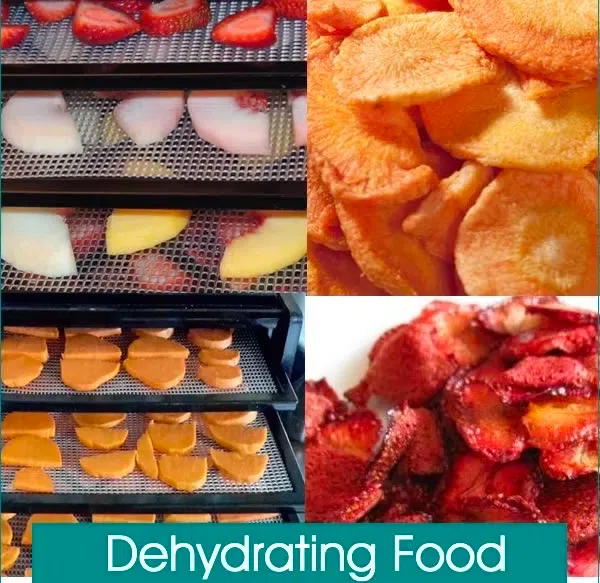
● Common Foods Suitable for Dehydration
● Troubleshooting Common Issues
● Creative Uses for Dried Foods
● Conclusion
● FAQ
>> 1. What types of foods can I dehydrate?
>> 2. How long does it take to dehydrate food?
>> 3. Can I use my oven instead of a dehydrator?
>> 4. How do I know when my food is fully dehydrated?
>> 5. How should I store dehydrated foods?
● Citations:
Food dehydration is a fantastic way to preserve fruits, vegetables, and meats while retaining their nutrients and flavors. Building your own food dehydrator can be a rewarding project that not only saves you money but also allows you to customize the dehydrator to fit your needs. This guide will walk you through the process of creating your own food dehydrator, discussing various methods, materials, and tips for successful dehydration.
Understanding Food Dehydration
Dehydrating food involves removing moisture content, which inhibits the growth of bacteria, yeast, and molds. This process makes food lightweight, compact, and extends its shelf life. Dehydration can be achieved through various methods, including electric dehydrators, ovens, sun drying, or air drying.
Benefits of Food Dehydration
- Longer Shelf Life: Dehydrated foods can last for months or even years when stored properly.
- Nutrient Retention: Properly dehydrated foods retain most of their vitamins and minerals.
- Lightweight: Dehydrated foods are easy to transport, making them ideal for camping or hiking.
- Cost-Effective: Making your own dehydrator can save you money compared to purchasing pre-packaged dehydrated foods.
Types of Food Dehydrators
1. Electric Dehydrators: These are the most common and efficient types available on the market. They usually come with multiple trays and temperature controls.
2. Solar Dehydrators: Ideal for those in sunny climates, these use solar energy to dehydrate food. They can be made from simple materials and are energy-efficient.
3. Oven Drying: If you don't have a dehydrator, your oven can serve as an alternative. However, it may consume more energy.
4. Air Drying: This method requires no special equipment but is less effective for high-moisture foods.
Materials Needed for a DIY Food Dehydrator
To build your own dehydrator, gather the following materials:
- Box or Cabinet: A sturdy wooden box or an old cabinet works well.
- Shelving Racks: Metal or mesh racks to hold the food items.
- Heat Source: A light bulb or heating element (like a heat lamp) to provide consistent heat.
- Fan: For air circulation; an old computer fan works great.
- Insulation Material: Aluminum foil can help reflect heat inside the box.
- Ventilation Holes: To allow moisture to escape.
Step-by-Step Guide to Building Your Own Food Dehydrator
Step 1: Prepare Your Box
Start with a wooden box or cabinet. If using a cabinet with glass panels, it will help trap heat better.
1. Cut Ventilation Holes: Drill holes at the bottom and sides of the box for airflow. Cover these holes with fine mesh to keep insects out.
2. Line with Insulation: Line the interior with aluminum foil (shiny side out) to reflect heat back into the box.
Step 2: Install Shelving Racks
Install metal or mesh racks inside the box at intervals that allow air circulation around the food items.
Step 3: Add Heat Source
1. Install Light Bulb/Heating Element:
- Cut a hole at the bottom of the box for your light fixture.
- Securely attach the light bulb inside the box using a fixture that allows for safe operation.
2. Connect Electrical Wiring: Ensure all electrical connections are safe and secure to prevent any hazards.

Step 4: Install Fan
1. Position a fan inside the box near the top to circulate warm air throughout.
2. Connect it to a power source ensuring it operates safely alongside your heating element.
Step 5: Final Assembly
Ensure everything is securely attached and that there are no exposed wires. Close up your dehydrator and test it by turning on the light and fan.
Using Your DIY Food Dehydrator
1. Prepare Your Food:
- Clean and slice fruits or vegetables into uniform pieces for even drying.
- Blanch vegetables if necessary to preserve color and nutrients.
2. Load the Racks:
- Place prepared food items on racks in a single layer without overlapping.
3. Set Temperature and Time:
- For most fruits and vegetables, set your dehydrator to around 135°F (57°C).
- Monitor regularly until food is dry but still pliable (for fruits) or crispy (for vegetables).
4. Storage:
- Once dried, let food cool before storing in airtight containers away from light and moisture.
Tips for Successful Dehydration
- Ensure even slicing of food items for consistent drying.
- Rotate trays if using an electric dehydrator for even airflow.
- Keep an eye on humidity levels; too much moisture can spoil dried foods.
- Experiment with different foods; some may take longer than others to dehydrate properly.
Common Foods Suitable for Dehydration
Certain foods lend themselves particularly well to dehydration:
- Fruits: Apples, bananas, strawberries, mangoes, peaches
- Vegetables: Zucchini, bell peppers, carrots, tomatoes
- Herbs: Basil, oregano, thyme
- Meats: Beef jerky (ensure proper marination)
Each type of food has its unique drying time and method; fruits usually require less time than vegetables or meats due to their higher sugar content.
Troubleshooting Common Issues
Even with careful preparation, you might encounter some challenges during dehydration:
- Uneven Drying: This often occurs due to overcrowding on racks or inconsistent slicing of food items. Ensure uniformity in size and avoid stacking too many layers of food on top of each other.
- Over-Drying or Burning: If food becomes too hard or burnt, reduce temperature settings or check your heat source's intensity.
- Moisture Retention After Storage: If you notice condensation in storage containers after sealing them up, this indicates that not all moisture was removed during dehydration. Consider re-drying those items before storing them again.
Creative Uses for Dried Foods
Once you've mastered dehydration techniques, consider exploring creative uses for your dried foods:
- Create trail mixes by combining nuts with dried fruits for a nutritious snack.
- Use dried herbs in cooking; they often have more concentrated flavors than fresh herbs.
- Rehydrate dried vegetables in soups or stews—this adds flavor while utilizing shelf-stable ingredients.
- Make homemade fruit leather by pureeing fruits before drying them into flat sheets.
Conclusion
Building your own food dehydrator is not only cost-effective but also allows you to preserve seasonal fruits and vegetables while enjoying healthy snacks year-round. With just a few materials and some basic DIY skills, you can create a functional dehydrator tailored to your needs.
By following this guide, you'll be well on your way to enjoying delicious homemade dried fruits, veggies, jerky, and more! The satisfaction of creating something from scratch combined with the health benefits of preserving your own food makes this project worthwhile.

FAQ
1. What types of foods can I dehydrate?
You can dehydrate fruits (like apples and bananas), vegetables (like tomatoes and peppers), herbs (like basil), and meats (to make jerky).
2. How long does it take to dehydrate food?
Dehydration times vary based on the type of food and thickness of slices but typically range from 6 to 12 hours at 135°F (57°C).
3. Can I use my oven instead of a dehydrator?
Yes! Set your oven between 140°F (60°C) and 170°F (77°C) with the door slightly open to allow moisture to escape.
4. How do I know when my food is fully dehydrated?
Fruits should be leathery but not sticky; vegetables should be brittle; jerky should be dry but still flexible without breaking easily.
5. How should I store dehydrated foods?
Store in airtight containers in a cool, dark place away from moisture for optimal shelf life.
Citations:
[1] https://www.wonderlandguides.com/backcountry-cooking/dehydrating-food/food-dehydrating-101
[2] https://www.subcriticalflow.com/2021/11/a-simple-dehydrator-build-with.html
[3] https://eatsleepwild.com/homemade-dehydrated-backpacking-meals/
[4] https://www.youtube.com/watch?v=mtDzdYoyeR8
[5] https://www.youtube.com/watch?v=F-Cge4qSOms
[6] https://www.freepik.com/free-photos-vectors/food-dehydrator
[7] https://homesteadingfamily.com/preservation-101-intro-to-dehydrating-food/
[8] https://www.gardeningknowhow.com/garden-how-to/info/diy-food-dehydrator.htm
[9] https://www.youtube.com/watch?v=Z0f0jew8Whw
[10] https://www.youtube.com/watch?v=hcn4uiBYeEw


