Content Menu
● Introduction
>> What is a Cabinet Type Dehydrator?
>> Why Choose a Cabinet Type Dehydrator?
● Preparing Vegetables for Dehydration
>> Selecting the Right Vegetables
>> Washing and Cleaning
>> Trimming and Cutting
>> Blanching and Pre-Treating
● Step-by-Step Guide to Using a Cabinet Type Dehydrator
>> Step 1: Arrange Vegetables on Trays
>> Step 2: Set Temperature and Time
>> Step 3: Monitor the Dehydration Process
>> Step 4: Test for Dryness
>> Step 5: Conditioning
>> Step 6: Storing Dehydrated Vegetables
● Tips and Tricks for Dehydrating Vegetables
● Benefits of Dehydrated Vegetables
● Common Issues and Troubleshooting
● In-Depth Look at Dehydration Techniques
>> Understanding Airflow
>> Temperature's Role
>> The Importance of Humidity
● Advanced Dehydration Practices
>> Dehydrating Herbs
>> Making Vegetable Powders
>> Creating Vegetable Chips
● Maintaining Your Cabinet Type Dehydrator
>> Regular Cleaning
>> Tray Rotation and Management
● Why Rotate Trays?
● How to Rotate Trays Effectively
● Tips for Managing Trays
>> Checking and Replacing Parts
● Using Dehydrated Vegetables in Recipes
>> Rehydration Techniques
>> Incorporating into Dishes
>> Making Vegetable Broth
● Advanced Tips from Our Experts
>> Customizing Your Dehydration
>> Maximizing Energy Efficiency
>> Safety Precautions
● Case Studies
>> Case Study 1: Using Dehydrated Vegetables in Restaurant Meal Prep
>> Case Study 2: Increasing Shelf Life in Food Production
● Conclusion
● FAQ
>> 1. What vegetables are best for dehydrating?
>> 2. How long do dehydrated vegetables last?
>> 3. What temperature should I use for dehydrating vegetables?
>> 4. Do I need to blanch vegetables before dehydrating them?
>> 5. How do I know when the vegetables are fully dehydrated?
● Citations:
Introduction
As a leading Chinese food dehydrator manufacturing factory, we provide top-notch OEM services for international food dehydrator brand owners, wholesalers, and manufacturers. With years of expertise, we aim to offer comprehensive guidance on using cabinet type dehydrators for vegetables effectively. This article will cover everything from preparation to storage, ensuring you maximize the benefits of this efficient food preservation method.
What is a Cabinet Type Dehydrator?
A cabinet type dehydrator is an appliance designed to remove moisture from food items, preserving them for longer periods. Unlike other dehydrators, cabinet models feature a box-like structure with multiple trays stacked inside, providing a controlled environment for even drying. These dehydrators are particularly effective for commercial use, offering consistent results and large-capacity drying.
Why Choose a Cabinet Type Dehydrator?
- Capacity: Handles large quantities, ideal for commercial use.
- Even Drying: Consistent temperature and airflow ensure uniform dehydration.
- Control: Precise temperature and time settings for various vegetables.
- Efficiency: Energy-efficient design for continuous operation.
- Durability: Built to withstand frequent use in demanding environments.
Preparing Vegetables for Dehydration
Selecting the Right Vegetables
The key to successful vegetable dehydration starts with selecting fresh, high-quality produce. Choose vegetables at their peak ripeness, free from bruises or blemishes. Some vegetables that dehydrate exceptionally well include carrots, zucchini, bell peppers, tomatoes, and leafy greens.
Washing and Cleaning
Thoroughly wash vegetables under cool running water. Use a soft brush to remove dirt from root vegetables like carrots. For leafy greens, soak them in water for a few minutes to dislodge any hidden debris. Pat dry with clean towels or use a salad spinner.
Trimming and Cutting
Trim off any bruised or damaged areas. Remove stems, seeds, and cores as needed. For vegetables like bell peppers, remove the seeds and white pith inside. Uniform size and thickness are crucial for even drying. Use a sharp knife or mandoline for consistent results. Slice carrots into 1/8-inch rounds or strips. Cut bell peppers into 1/4-inch wide strips. Separate broccoli into small florets. Aim for pieces that are similar in size and shape to ensure they dry at the same rate. Smaller, thinner pieces will dehydrate faster than larger, thicker ones.
Blanching and Pre-Treating
Blanching is an essential step for many vegetables before dehydration, helping to preserve color, texture, and nutritional value. To blanch, bring a large pot of water to a boil. Submerge vegetables in small batches for 1-3 minutes, depending on the type. Carrots and peas need about 2 minutes, while broccoli requires 3 minutes. After blanching, immediately plunge vegetables into ice water to stop the cooking process. Drain well before dehydrating. Some vegetables, like mushrooms and okra, benefit from a brief soak in lemon juice or ascorbic acid solution to prevent browning.
Step-by-Step Guide to Using a Cabinet Type Dehydrator
Step 1: Arrange Vegetables on Trays
Arrange the prepared vegetables in a single layer on the dehydrator trays. Ensure pieces don't overlap and there's enough space between each piece for proper airflow.
Step 2: Set Temperature and Time
Set the temperature according to the vegetable type, typically between 125°F-135°F (52°C-57°C). Drying time varies depending on the vegetable and slice thickness, generally ranging from 4 to 12 hours.
Step 3: Monitor the Dehydration Process
Check the vegetables periodically to ensure even drying. Rotate the trays if necessary to compensate for any temperature variations within the cabinet.
Step 4: Test for Dryness
To test if the vegetables are fully dehydrated, remove a piece from the dehydrator and allow it to cool to room temperature. It should be leathery and brittle, with no signs of moisture when broken in half. If any moisture is present, place the vegetables back in the dehydrator for additional drying time.

Step 5: Conditioning
After drying, let the vegetables cool for about 30 minutes to an hour. Place them loosely in a container and shake them daily for a week. This conditioning process helps equalize any remaining moisture among the dried pieces, preventing mold during storage.
Step 6: Storing Dehydrated Vegetables
Once the vegetables are fully dried and conditioned, transfer them to airtight containers or resealable bags. Store them in a cool, dark place away from moisture and sunlight to maintain their quality. Properly stored dried vegetables can last for several months to a year.
Tips and Tricks for Dehydrating Vegetables
- Uniform Slices: Ensure consistent drying by slicing vegetables uniformly.
- Single Layer: Avoid overlapping vegetables on trays to promote airflow.
- Temperature Control: Monitor and adjust temperature for optimal results.
- Pre-Treatment: Blanching or using lemon juice can enhance color and flavor.
- Proper Storage: Use airtight containers and store in a cool, dark place.
Benefits of Dehydrated Vegetables
- Extended Shelf Life: Dehydration significantly prolongs the usability of vegetables.
- Nutrient Retention: Maintains most of the nutritional value of fresh produce.
- Space Saving: Dried vegetables take up less storage space than fresh ones.
- Convenience: Easy to rehydrate for use in soups, stews, and other dishes.
- Reduced Food Waste: Prevents spoilage, reducing waste and saving money.
Common Issues and Troubleshooting
- Uneven Drying: Ensure vegetables are sliced uniformly and trays are rotated.
- Mold Growth: Proper conditioning and airtight storage prevent mold.
- Vegetables Too Hard: Adjust temperature and drying time for desired texture.
- Loss of Flavor: Pre-treat vegetables to retain flavor during dehydration.
In-Depth Look at Dehydration Techniques
Understanding Airflow
Airflow is paramount for even dehydration. Cabinet type dehydrators are designed to circulate air efficiently, but it's still vital to ensure the vents aren't blocked and the trays are properly spaced. Some models come with adjustable fans; experiment with different fan speeds to optimize drying.
Temperature's Role
The correct temperature is crucial. Too high, and the vegetables will dry on the outside while retaining moisture inside. Too low, and it will take too long, increasing the risk of spoilage. Refer to dehydration charts for specific vegetables to fine-tune your settings.
The Importance of Humidity
Environmental humidity can impact drying times. On humid days, it may take longer for vegetables to dehydrate. Consider using your dehydrator in an air-conditioned space to control humidity levels.
Advanced Dehydration Practices
Dehydrating Herbs
Herbs are incredibly easy to dehydrate and retain their flavor remarkably well. Simply wash, pat dry, and lay them in a single layer on the dehydrator trays. Dehydrate at a lower temperature (around 95°F/35°C) for 2-4 hours until the leaves are brittle.
Making Vegetable Powders
Dehydrated vegetables can be ground into powders, which are excellent for adding nutrients to smoothies, soups, and sauces. Use a high-speed blender or food processor to pulverize the dried vegetables into a fine powder. Store in airtight containers.
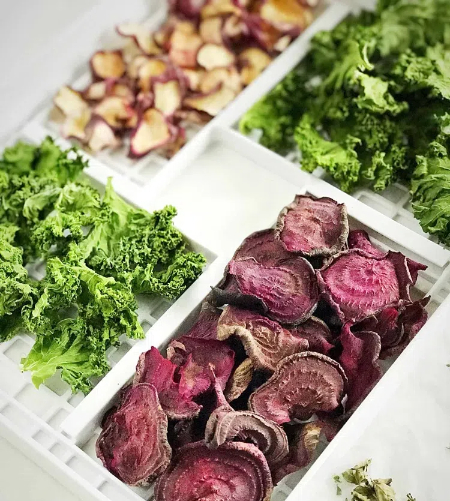
Creating Vegetable Chips
For a healthy snack, consider making vegetable chips. Thinly slice vegetables like sweet potatoes, beets, or kale, and dehydrate them with a sprinkle of salt and spices. These chips are a great alternative to processed snacks.
Maintaining Your Cabinet Type Dehydrator
Regular Cleaning
Keep your dehydrator clean to prevent the buildup of bacteria and odors. After each use, wipe down the interior and trays with a damp cloth. For stubborn residue, use a mild soap and water solution. Ensure all parts are completely dry before storing.
Tray Rotation and Management
Regularly rotating trays during the dehydration process ensures even drying by exposing all sections of the food to uniform heat and airflow. This practice is particularly important in cabinet-style dehydrators where temperature distribution might vary slightly from top to bottom.
Why Rotate Trays?
- Even Heat Distribution: Heat may not be uniformly distributed throughout the dehydrator. Trays closer to the heat source (often at the bottom or back) may dry food faster.
- Consistent Airflow: Airflow patterns can vary within the cabinet. Rotating trays ensures all items receive adequate airflow, preventing some pieces from drying slower than others.
- Prevent Over-drying: Rotating trays helps prevent certain items from over-drying while others remain moist, which is crucial for maintaining the quality and shelf life of the dehydrated vegetables.
How to Rotate Trays Effectively
1. Frequency of Rotation: Generally, rotate the trays every 3-4 hours during the dehydration process. This frequency can be adjusted based on the specific vegetable and the dehydrator model.
2. Rotation Pattern:
- Move trays from the bottom to the top, top to the middle, and middle to the bottom.
- If your dehydrator has a back-to-front airflow, rotate trays from back to front and vice versa.
3. Marking Trays: To keep track of the rotation, you can use labels or a marker to number the trays. This helps ensure that all trays are rotated systematically.
4. Check for Drying Progress: While rotating, inspect the vegetables on each tray to gauge their drying progress. This allows you to make adjustments to the drying time or temperature if needed.
5. Adjustments Based on Observation: If you notice that some trays are drying significantly faster, you might need to adjust the temperature or redistribute the vegetables to ensure uniform drying.
Tips for Managing Trays
- Avoid Overcrowding: Make sure the vegetables are spread in a single layer on each tray without overlapping. Overcrowding restricts airflow and leads to uneven drying.
- Consistent Slicing: Uniformly sliced vegetables dry at the same rate. Use a mandoline or a sharp knife to ensure consistent thickness.
- Proper Loading: Load the trays in a way that maximizes airflow. If your dehydrator has specific guidelines, follow them closely.
- Clean Trays: Ensure trays are clean before use to avoid contamination and to facilitate proper airflow.
Checking and Replacing Parts
Inspect the fan and heating element regularly. Replace any worn parts to ensure optimal performance and prevent breakdowns.
Using Dehydrated Vegetables in Recipes
Rehydration Techniques
To rehydrate vegetables, soak them in warm water for 15-30 minutes until they regain their original texture. Use the rehydration liquid as a flavorful broth in soups or stews.
Incorporating into Dishes
Add dehydrated vegetables to soups, stews, and casseroles for a nutritional boost. They also make a great addition to trail mixes and snacks.
Making Vegetable Broth
Use dehydrated vegetable scraps to make a flavorful and nutritious broth. Simmer the scraps in water for an hour, then strain and use the broth as a base for soups and sauces.
Advanced Tips from Our Experts
Customizing Your Dehydration
Experiment with different spices and seasonings to create unique flavored dried vegetables. Consider adding garlic powder, onion powder, chili powder, or herbs to enhance the flavor.
Maximizing Energy Efficiency
Run your dehydrator during off-peak hours to save on electricity costs. Consider investing in a timer to automatically turn off the dehydrator when the drying is complete.
Safety Precautions
Always unplug your dehydrator before cleaning or performing maintenance. Keep the dehydrator away from flammable materials and ensure it is placed on a stable surface.
Case Studies
Case Study 1: Using Dehydrated Vegetables in Restaurant Meal Prep
A restaurant successfully integrated dehydrated vegetables into their meal preparation process. By dehydrating vegetables in bulk during the off-season, they were able to reduce food waste and ensure a consistent supply of high-quality ingredients year-round. They found that using dehydrated vegetables not only saved on storage space but also enhanced the flavor of their dishes.
Case Study 2: Increasing Shelf Life in Food Production
A small food production company specialized in organic snacks. They used dehydrated vegetables to extend the shelf life of their products without adding artificial preservatives. The dehydrated vegetables maintained their nutritional value, aligning with the company's focus on healthy ingredients.
Conclusion
Using a cabinet type dehydrator for vegetables is an efficient and effective way to preserve food, reduce waste, and provide healthy snacks and ingredients year-round. By following these guidelines, you can maximize the benefits of your dehydrator and produce high-quality dried vegetables every time. As a leading OEM provider, we are committed to delivering top-of-the-line dehydrators tailored to meet the demands of your customers.

FAQ
1. What vegetables are best for dehydrating?
Carrots, zucchini, bell peppers, tomatoes, and leafy greens are excellent choices due to their ability to retain flavor and texture after dehydration.
2. How long do dehydrated vegetables last?
Properly stored dehydrated vegetables can last for several months to a year. Ensure they are in airtight containers and kept in a cool, dark place.
3. What temperature should I use for dehydrating vegetables?
The ideal temperature is typically between 125°F and 135°F (52°C-57°C), but this can vary depending on the specific vegetable.
4. Do I need to blanch vegetables before dehydrating them?
Blanching is recommended for many vegetables as it helps preserve color, texture, and nutritional value.
5. How do I know when the vegetables are fully dehydrated?
Vegetables should be leathery and brittle, with no signs of moisture when broken in half.
Citations:
[1] https://www.dehydratedelight.com/vegetables/how-to-dehydrate-veggies-at-home/
[2] https://patents.google.com/patent/CN110207480A/zh
[3] https://misterchef.co.uk/how-to-dehydrate-vegetables/
[4] https://patents.google.com/patent/CN1110593C/zh
[5] https://www.dryeratech.com/a-beginner-s-guide-to-using-a-cabinet-type-dehydrator.html
[6] https://www.whirlpool.com.hk/media/wysiwyg/Downloads/WWPR64210_user_manual_program_chart_EN_CN.pdf
[7] https://www.wonderlandguides.com/backcountry-cooking/dehydrating-food/food-dehydrating-101
[8] https://patents.google.com/patent/CN1405396A/zh


