Content Menu
● Introduction
● Why Regular Maintenance Matters
● Key Components of a Cabinet Type Dehydrator
● Step-by-Step Maintenance Guide
● Addressing Common Issues
● Advanced Troubleshooting Tips
● Additional Tips for Optimal Maintenance
● Conclusion
● FAQ
>> 1. How often should I clean my dehydrator?
>> 2. Can I use dish soap to clean the dehydrator trays?
>> 3. What should I do if the heating element is damaged?
>> 4. How can I prevent food from sticking to the trays?
>> 5. Where should I store my dehydrator when it's not in use?
● Citations:
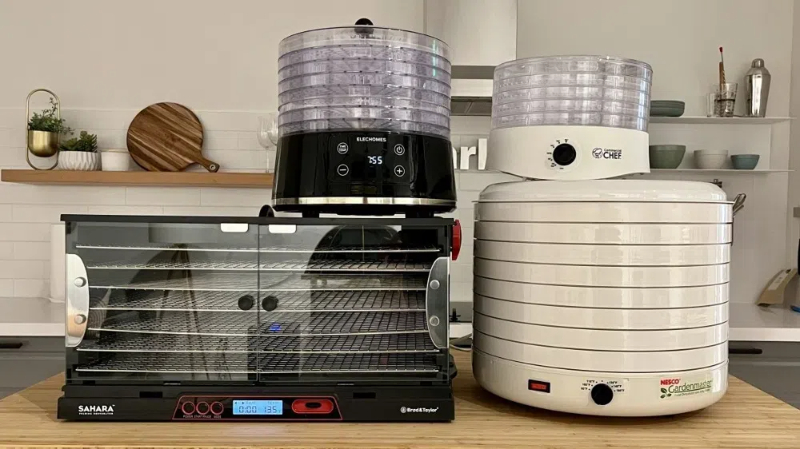
As a Chinese food dehydrator manufacturing factory providing OEM services, it's crucial to equip your partners—brands, wholesalers, and manufacturers—with comprehensive maintenance knowledge. This ensures the longevity, efficiency, and hygiene of cabinet-type dehydrators. Regular maintenance, proactive troubleshooting, and a deep understanding of potential issues are vital for maintaining the performance and reliability of these essential kitchen appliances.

Introduction
Cabinet-type dehydrators are indispensable tools for preserving food, offering a convenient way to extend the shelf life of fruits, vegetables, meats, and herbs. However, like any appliance, they are prone to issues that can affect their performance. This guide provides essential maintenance tips, incorporating images, videos, FAQs, and relevant keywords to optimize its utility.
Why Regular Maintenance Matters
Maintaining your cabinet-type dehydrator is essential for ensuring its longevity, efficiency, and the safety of your dehydrated products. By following these step-by-step maintenance tips, you can keep your dehydrator in top condition, reduce downtime, and produce high-quality results consistently. Regular cleaning, inspection, and proper storage are key to a reliable and efficient dehydration process.
Key Components of a Cabinet Type Dehydrator
Before diving into troubleshooting, it's important to understand the main components of a cabinet-type dehydrator:
- Heating Element: Responsible for generating the heat needed for drying.
- Fan: Circulates hot air evenly throughout the cabinet.
- Thermostat: Regulates the temperature to ensure consistent drying.
- Trays: Hold the food items during the dehydration process.
- Control Panel: Allows users to set temperature and time.
- Cabinet: Encloses all components, maintaining consistent temperature.
Step-by-Step Maintenance Guide
1. Cleaning the Trays:
- Frequency: After each use. It is recommended to clean your dehydrator after each use. This prevents the build-up of food particles and ensures your machine is always ready for the next batch.
- Process: Remove the trays and wash them with warm, soapy water. Use a soft brush to remove any stuck-on food particles. For stubborn residues, a soak in a solution of water and baking soda can be effective. Ensure the trays are completely dry before placing them back into the dehydrator.
2. Cleaning the Cabinet Interior:
- Frequency: After each use.
- Process: Wipe the interior of the cabinet with a damp cloth. For stubborn stains, use a mild detergent. Make sure to dry the interior thoroughly before using the dehydrator again. Pay special attention to corners and crevices where food particles might accumulate. Consider using a vacuum cleaner with a brush attachment to remove loose debris before wiping.
3. Cleaning the Cabinet Exterior:
- Frequency: As needed.
- Process: Wipe down the exterior with a damp cloth to remove dust and spills. For stainless steel exteriors, use a stainless steel cleaner to maintain the finish.

4. Inspecting the Heating Element:
- Frequency: Every 6 months.
- Process: Visually inspect the heating element for any signs of damage or corrosion. If you notice any issues, contact a qualified technician. Look for any signs of discoloration, cracks, or physical damage.
5. Checking the Fan:
- Frequency: Every 3 months.
- Process: Ensure the fan is free from obstructions and spins freely. Clean any dust or debris that may have accumulated on the fan blades. Use a soft brush or compressed air to clean the fan blades. Check the fan motor for any unusual noises or vibrations.
6. Testing the Thermostat:
- Frequency: Annually, or if you suspect temperature inaccuracies.
- Process: Use an oven thermometer placed inside the dehydrator to verify the accuracy of the thermostat. Adjust the thermostat according to the manufacturer's instructions if necessary. Inaccurate temperature readings can lead to under- or over-dried food. Document the calibration process for future reference.
7. Checking Electrical Connections:
- Frequency: Annually.
- Process: Inspect all electrical connections for tightness and signs of wear. Ensure that the power cord is in good condition. Look for frayed wires, loose connections, and signs of overheating. If you notice any issues, consult a qualified electrician.
8. Proper Storage:
- When not in use, store the dehydrator in a cool, dry place. Cover it to protect it from dust and pests. Consider using a dehumidifier in the storage area to prevent moisture buildup.
Addressing Common Issues
1. Dehydrator Not Turning On:
Possible Causes:
- Power cord not properly connected.
- Blown fuse or tripped circuit breaker.
- Faulty power switch.
- Overload Protection Triggered: Some dehydrators have an overload protection feature that can be triggered if the unit is overworked or overheated.
Troubleshooting Steps:
- Ensure the power cord is securely plugged into a working outlet.
- Check the fuse and circuit breaker. Replace the fuse if necessary.
- Test the power switch with a multimeter to check for continuity.
- Reset Overload Protection: If your dehydrator has an overload protection button, ensure it is properly reset.
2. Inconsistent Drying:
Possible Causes:
- Unevenly sliced food.
- Overcrowding the trays.
- Inaccurate thermostat.
- Uneven Airflow: Obstructions or improper loading can disrupt airflow within the dehydrator.
Troubleshooting Steps:
- Ensure all food slices are of uniform thickness.
- Avoid overcrowding the trays; leave space for air to circulate.
- Calibrate the thermostat using an oven thermometer.
3. Food Drying Too Slowly:
Possible Causes:
- Temperature set too low.
- High humidity in the environment.
- Clogged air vents.
- Door Seal Issues: A faulty door seal can allow heat to escape, slowing down the drying process.
Troubleshooting Steps:
- Increase the temperature setting.
- Use the dehydrator in a room with low humidity.
- Ensure that air vents are clear of obstructions.
- Inspect Door Seal: Check the door seal for any signs of damage or wear. Replace the seal if necessary.
4. Food Drying Too Quickly/Case Hardening:
Possible Causes:
- Temperature set too high.
- Over-drying.
- Low Humidity: Extremely low humidity can cause the outside of the food to dry too quickly, trapping moisture inside.
Troubleshooting Steps:
- Lower the temperature setting.
- Monitor the food closely and reduce drying time.
- Increase Humidity: Place a bowl of water near the dehydrator to increase humidity.
5. Unusual Noises:
Possible Causes:
- Loose fan blade.
- Motor issues.
- Vibration due to improper placement.
- Debris in Fan: Small particles of food or other debris can get caught in the fan, causing unusual noises.
Troubleshooting Steps:
- Tighten the fan blade.
- Contact a qualified technician to inspect the motor.
- Ensure the dehydrator is placed on a stable, level surface.
- Clean Fan Housing: Carefully inspect and clean the fan housing to remove any debris.
6. Burning Smell:
Possible Causes:
- Food particles on the heating element.
- Electrical issues.
- Overheating: In some cases, a burning smell can indicate that the dehydrator is overheating, potentially due to a malfunctioning thermostat or other component.
Troubleshooting Steps:
- Unplug the dehydrator and clean the heating element.
- Inspect the electrical connections. If the smell persists, contact a technician.
- Monitor Temperature: Use an oven thermometer to monitor the temperature inside the dehydrator and ensure it does not exceed the set temperature. If the dehydrator consistently overheats, seek professional repair.
7. Error Codes:
Possible Causes:
- Temperature sensor error.
- Humidity sensor error.
- Program error.
- Voltage Fluctuations: Inconsistent power supply can sometimes trigger error codes.
Troubleshooting Steps:
- Refer to the manufacturer's manual for specific error code solutions.
- Contact customer service for assistance.
- Check Voltage: Ensure the dehydrator is receiving the correct voltage as specified in the manufacturer's instructions. Use a voltage tester to check the outlet.
Advanced Troubleshooting Tips
- Heating Element Testing: Use a multimeter to test the heating element for continuity. A lack of continuity indicates a broken heating element that needs replacement.
- Temperature Uniformity Test: Place multiple thermometers throughout the dehydrator to ensure even temperature distribution. Inconsistent temperatures may indicate a faulty fan or heating element.
- Humidity Control Calibration: Some advanced models have humidity control features. Consult the manufacturer's instructions for calibrating these sensors.
- Wiring Diagram Review: Obtain and review the wiring diagram for your specific dehydrator model. This can be invaluable when troubleshooting electrical issues.
Additional Tips for Optimal Maintenance
- Refer to the Manual: Always consult the manufacturer's manual for specific maintenance instructions. Each dehydrator model may have unique requirements.
- Monitor Performance: Pay attention to any unusual noises, smells, or changes in drying performance. Early detection of issues can prevent major problems.
- Professional Servicing: Schedule regular servicing with a qualified technician, especially for commercial units. Professional servicing can identify and address issues that may not be apparent during routine maintenance.
- Record Maintenance: Keep a log of all maintenance activities to track performance and identify potential issues. This log can also be helpful for warranty claims or troubleshooting.
Conclusion
Maintaining a cabinet-type dehydrator involves regular cleaning, diligent inspection, and prompt troubleshooting. By understanding the key components and following the recommended maintenance steps, you can ensure the dehydrator operates efficiently and safely, providing consistent results for years to come. Properly addressing common issues and keeping a detailed maintenance log will further extend the life and reliability of the appliance. Advanced troubleshooting techniques and adherence to manufacturer guidelines will optimize performance and minimize downtime.

FAQ
1. How often should I clean my dehydrator?
It is recommended to clean your dehydrator after each use. This prevents the build-up of food particles and ensures your machine is always ready for the next batch.
2. Can I use dish soap to clean the dehydrator trays?
Yes, you can use dish soap to clean the dehydrator trays. Ensure you rinse them thoroughly to remove any soap residue before placing them back in the dehydrator.
3. What should I do if the heating element is damaged?
If the heating element is damaged, contact a qualified technician for repair or replacement. Do not attempt to repair it yourself, as this could be dangerous.
4. How can I prevent food from sticking to the trays?
To prevent food from sticking to the trays, you can use parchment paper or non-stick drying sheets. Also, ensure that the food is properly prepared and not overly wet.
5. Where should I store my dehydrator when it's not in use?
When not in use, store the dehydrator in a cool, dry place. Cover it to protect it from dust and pests.
Citations:
[1] https://www.dryeratech.com/essential-maintenance-tips-for-your-cabinet-type-dehydrator.html
[2] https://www.reddit.com/r/AskElectronics/comments/xs4dtx/my_cabelas_dehydrator_stopped_working_and_upon/
[3] https://patents.google.com/patent/CN110207480A/zh
[4] https://www.ukjuicers.com/Lib/Doc/Nutridry_ST-10_online_instruction_manual.pdf
[5] https://www.keimling.de/media/14/ae/35/1677074223/CI-IR%20D5_Manual-engl1.pdf
[6] https://www.electrolux-ui.com/DocumentDownLoad.aspx?DocURL=2011%5C136%5C918250umEN.pdf
[7] https://www.pressurecooker-outlet.com/Manuals/Weston-Steel-Dehydrator.pdf
[8] https://dehydratedfoodz.com/issues-with-food-dehydrators/
[9] https://images.thdstatic.com/catalog/pdfImages/1e/1e6fc46e-78ce-434a-b5be-4990ea1746f7.pdf


