Content Menu
● Understanding Food Dehydration
>> Benefits of Using a Food Dehydrator
● Choosing the Right Food Dehydrator
● Preparing Food for Dehydration
>> Selecting Fresh Ingredients
>> Washing and Cutting
>> Pretreating Foods
● Steps for Using a Food Dehydrator
>> Step 1: Set Up the Dehydrator
>> Step 2: Arrange the Food
>> Step 3: Adjust Temperature Settings
>> Step 4: Start Dehydrating
>> Step 5: Check for Doneness
>> Step 6: Cool Down
● Storing Dehydrated Foods
● Tips for Successful Dehydration
>> Additional Techniques for Enhanced Results
>>> Use Non-Stick Sprays or Liners
>>> Steam Low-Acid Vegetables
>>> Monitor Humidity Levels
>>> Experiment with Blended Foods
>>> Test Dryness Regularly
● Creative Uses for Dehydrated Foods
● Conclusion
● FAQ
>> 1. How long does it take to dehydrate food?
>> 2. Can I dehydrate frozen fruits or vegetables?
>> 3. Do I need to peel fruits before dehydrating?
>> 4. Can I use my oven instead of a dehydrator?
>> 5. How do I know when my food is done?
● Citations:
Food dehydrators are essential appliances for anyone interested in preserving food, making snacks, or creating unique culinary experiences. They allow you to remove moisture from fruits, vegetables, meats, and herbs, extending their shelf life while retaining flavor and nutrients. This article will guide you through the basic steps for using a food dehydrator effectively, ensuring you make the most of this versatile kitchen tool.
Understanding Food Dehydration
Food dehydration is a process that removes moisture from food to inhibit the growth of bacteria, yeast, and mold. By lowering the water content to around 20%, dehydrated foods can be stored for months or even years without refrigeration.
Benefits of Using a Food Dehydrator
- Preservation: Extends the shelf life of food.
- Nutrition: Retains vitamins and minerals better than other preservation methods.
- Convenience: Easy to use and maintain.
- Cost-effective: Reduces food waste and saves money on store-bought snacks.
- Versatility: Can be used for a variety of foods including fruits, vegetables, meats, and herbs.
Choosing the Right Food Dehydrator
Before diving into the steps for using a food dehydrator, it's essential to choose the right model. Here are some factors to consider:
- Size: Depending on your needs, choose a compact model for small batches or a larger one for family-sized portions.
- Type: There are two main types—stackable and shelf models. Stackable models are often more affordable but may have uneven drying. Shelf models provide better airflow and consistent drying.
- Temperature Control: Look for models with adjustable temperature settings to accommodate different types of food.
Preparing Food for Dehydration
To achieve the best results, proper preparation of food is crucial.
Selecting Fresh Ingredients
Choose high-quality, fresh ingredients. The better the quality of your raw materials, the better your final product will be.
Washing and Cutting
1. Wash: Rinse fruits and vegetables under cold water to remove dirt and pesticides.
2. Cut: Slice foods into uniform pieces to ensure even drying. For example:
- Fruits should be sliced about 1/4 inch thick.
- Vegetables can be blanched briefly before slicing to preserve color and nutrients.
Pretreating Foods
Some foods benefit from pretreatment:
- Fruits: Soak in lemon juice or a solution of ascorbic acid to prevent browning.
- Vegetables: Blanching can help retain color and texture.

Steps for Using a Food Dehydrator
Once your ingredients are ready, follow these steps to use your food dehydrator effectively:
Step 1: Set Up the Dehydrator
Place your dehydrator on a flat surface away from direct sunlight. Ensure it has enough space for air circulation.
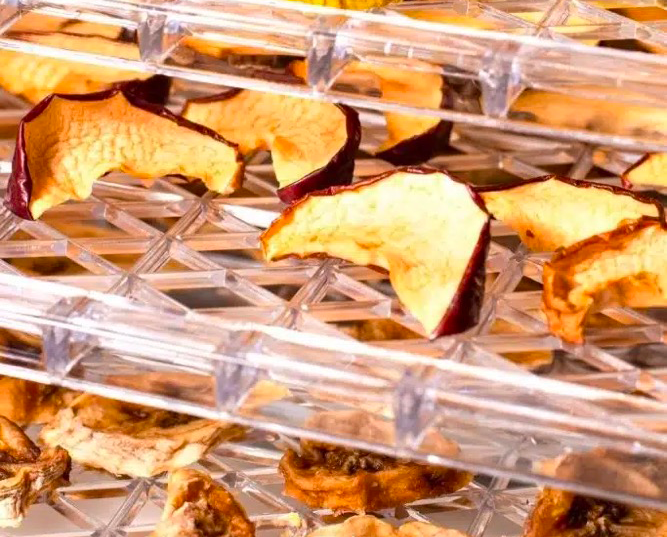
Step 2: Arrange the Food
- Lay out the prepared food in a single layer on the dehydrator trays.
- Avoid overcrowding; leave space between pieces for air circulation.
Step 3: Adjust Temperature Settings
Set the temperature based on the type of food you're dehydrating:
| Food Type | Recommended Temperature |
| Fruits | 135°F (57°C) |
| Vegetables | 125°F (52°C) |
| Herbs | 95°F (35°C) |
| Jerky (Meat) | 155°F (68°C) |
Step 4: Start Dehydrating
Turn on the dehydrator and monitor it periodically. Depending on the type of food and thickness of slices, drying can take anywhere from 4 to 12 hours.
Step 5: Check for Doneness
To check if your food is adequately dehydrated:
- Fruits should be pliable but not sticky.
- Vegetables should be brittle.
- Jerky should be firm yet flexible without being overly dry.
Step 6: Cool Down
Once dried, allow the food to cool before storing it in airtight containers.
Storing Dehydrated Foods
Proper storage is key to maintaining quality:
- Use airtight containers or vacuum-sealed bags.
- Store in a cool, dark place away from moisture.
- Label containers with dates for easy tracking.
Tips for Successful Dehydration
- Rotate trays during drying for even results.
- Keep notes on drying times and temperatures for future reference.
- Experiment with different foods and combinations to discover new flavors.
Additional Techniques for Enhanced Results
Use Non-Stick Sprays or Liners
For easier cleanup, consider using non-stick cooking spray on your trays or lining them with parchment paper or silicone mats. This prevents sticking and makes it easier to remove dried foods later[1].
Steam Low-Acid Vegetables
For vegetables like carrots or snow peas that are low in acid, steaming them briefly before dehydration can help retain color and nutrients[1][2].
Monitor Humidity Levels
Humidity can significantly affect dehydration times. If you live in a humid area, expect longer drying times. Conversely, in dry climates, foods may dry faster[5].
Experiment with Blended Foods
You can also dehydrate blended foods like soups or sauces by spreading them thinly on non-stick sheets. This method allows you to create unique snacks like fruit leathers or vegetable chips[2][6].
Test Dryness Regularly
Check your food periodically during the dehydration process. A good test is placing a piece in a glass; if it fogs up quickly, it still contains moisture[3].
Creative Uses for Dehydrated Foods
Dehydrated foods are not just snacks; they can also enhance various dishes:
- Soups & Stews: Add dehydrated vegetables back into soups or stews during cooking for added flavor and nutrition.
- Trail Mixes: Combine dried fruits with nuts and seeds for an energy-packed snack perfect for hiking or outdoor activities.
- Baking Ingredients: Use crushed dried fruits in muffins or breads for unique flavors.
Conclusion
Using a food dehydrator is an excellent way to preserve your favorite foods while creating healthy snacks at home. By following the basic steps outlined above—from preparation to storage—you can enjoy delicious dried fruits, vegetables, jerky, and more. With practice, you'll refine your techniques and discover new recipes that suit your taste.
The versatility of a food dehydrator means that you can experiment with various ingredients and methods to create unique culinary delights that cater to your preferences. Whether you're looking to make healthy snacks or preserve seasonal produce for later use, mastering the art of dehydration will expand your culinary repertoire significantly.

FAQ
1. How long does it take to dehydrate food?
The time varies depending on the type of food and thickness of slices but generally ranges from 4 to 12 hours.
2. Can I dehydrate frozen fruits or vegetables?
Yes, but it's recommended to thaw them first before dehydrating for better results.
3. Do I need to peel fruits before dehydrating?
Peeling is optional; it depends on personal preference and the type of fruit being used.
4. Can I use my oven instead of a dehydrator?
Yes, but ovens may not provide consistent temperatures or airflow like dedicated dehydrators do.
5. How do I know when my food is done?
Check for specific textures; fruits should be pliable, vegetables brittle, and jerky firm yet flexible without being overly dry.
Citations:
[1] https://www.cnet.com/pictures/tips-for-using-your-new-dehydrator/
[2] https://www.backpackingchef.com/dehydrating-food.html
[3] https://www.mitchellcooper.co.uk/what-is-a-dehydrator-commercial-buying-guide
[4] https://www.thepurposefulpantry.com/dehydrating-faq/
[5] https://learn.eartheasy.com/guides/a-beginners-guide-to-dehydrating-food/
[6] https://www.freshoffthegrid.com/dehydrating-food/
[7] https://www.dehydrate2store.com/howto/how-to-dehydrate-faq/
[8] https://www.youtube.com/watch?v=rR2G5UO-5Ms
[9] https://www.allrecipes.com/article/how-to-use-a-food-dehydrator/


