Content Menu
● Introduction
● Understanding Food Dehydration
● Types of DIY Food Drying Machines
>> 1. Solar Food Dryer
>> 2. Electric Food Dehydrator
>> 3. Upcycled Dehydrator
● Building Your DIY Food Drying Machine
>> Step 1: Planning and Design
>> Step 2: Gathering Materials
>> Step 3: Construction
>> Step 4: Testing and Adjustments
● Using Your Homemade Food Dehydrator
● Benefits of DIY Food Drying Machines
● Conclusion
● Frequently Asked Questions
>> 1. What are the best foods to dry in a homemade food dehydrator?
>> 2. How long does it take to dry food in a DIY food drying machine?
>> 3. Is it safe to use a homemade food dehydrator?
>> 4. How do I clean my DIY food drying machine?
>> 5. Can I use my DIY food dehydrator for other purposes?
Introduction
In an era where sustainability and self-sufficiency are becoming increasingly important, many people are turning to DIY food drying machines as a way to preserve their harvest and reduce food waste. Whether you're a gardening enthusiast, a health-conscious individual, or simply someone who loves to experiment with food preservation techniques, building your own food dehydrator can be a rewarding and cost-effective project. This comprehensive guide will walk you through the world of homemade food dehydrators, from solar-powered options to electric models, and provide you with the knowledge to create your own large-capacity food dehydrator.
Understanding Food Dehydration
Before we dive into the specifics of DIY food drying machines, it's essential to understand the basic principles of food dehydration. Dehydration is one of the oldest methods of food preservation, dating back thousands of years. The process involves removing moisture from food, which inhibits the growth of bacteria, yeasts, and molds, thus extending the shelf life of various fruits, vegetables, and meats.
Modern food dehydrators work by circulating warm air around the food, gradually removing moisture while preserving nutrients and flavors. This process can be achieved through various methods, including solar power, electric heating elements, or even the residual heat from a wood stove.
")
Types of DIY Food Drying Machines
1. Solar Food Dryer
One of the most eco-friendly options for a DIY food drying machine is the solar food dryer. These sustainable food drying techniques harness the power of the sun to dehydrate your produce. Solar food dryers typically consist of a series of trays enclosed in a box with a transparent top to allow sunlight in. The sun's rays heat the air inside the box, which rises and passes over the food, carrying moisture away. To build a solar food dehydrator, you'll need:
- A wooden frame
- Clear plastic or glass for the top
- Mesh screens for the trays
- Dark-colored material for the interior to absorb heat
The beauty of a solar food dryer lies in its simplicity and energy efficiency. It's perfect for those living in sunny climates and looking to reduce their carbon footprint.
2. Electric Food Dehydrator
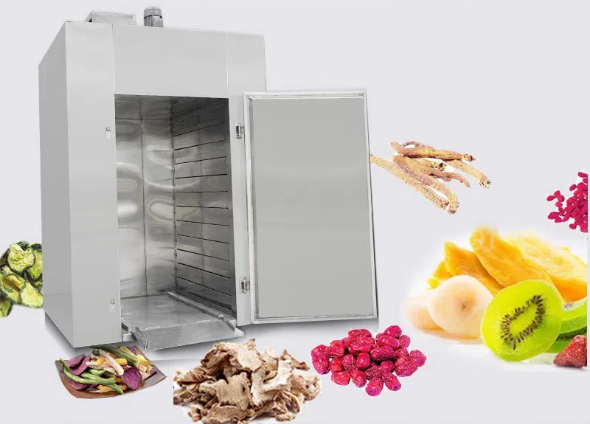
For those seeking more control over the drying process, an electric food dehydrator is an excellent option. These DIY food drying machines use a heating element and a fan to circulate warm air over the food. While they require electricity to operate, they offer consistent results regardless of weather conditions.
To create your own electric food dehydrator, you'll need:
- A wooden or plastic box
- A heating element (such as a light bulb or heating coil)
- A small fan for air circulation
- Trays or racks to hold the food
- A thermostat for temperature control
Electric food dehydrators are versatile and can be used to make a wide variety of dried foods, from fruit leathers to homemade jerky.
3. Upcycled Dehydrator
For the environmentally conscious DIY enthusiast, creating a food drying machine from upcycled materials is an exciting challenge. This approach not only reduces waste but also allows for creative problem-solving.
Some ideas for upcycled dehydrator materials include:
- Old wooden drawers or crates for the frame
- Repurposed computer fans for air circulation
- Salvaged glass or clear plastic sheets for solar models
- Recycled wire racks or old oven trays By using upcycled materials, you can create a unique and functional food dehydrator while giving new life to items that might otherwise end up in a landfill.

Building Your DIY Food Drying Machine
Now that we've explored the different types of food dehydrators, let's focus on how to build a large-capacity food dehydrator that can handle significant quantities of produce.
Step 1: Planning and Design
Before you start building, it's crucial to plan your dehydrator's design. Consider factors such as:
- The types of food you'll be drying
- The amount of food you want to dry at once
- The space you have available
- Your climate and whether solar power is a viable option
Sketch out your design, including dimensions and materials needed. This will serve as your blueprint throughout the building process.
Step 2: Gathering Materials
Based on your design, gather all necessary materials. For a large-capacity electric food dehydrator, you might need:
- Plywood or food-grade plastic sheets for the exterior
- Insulation material to maintain consistent temperatures
- A heating element and thermostat for temperature control
- A fan for air circulation
- Food-safe mesh or trays for holding the produce
- Screws, hinges, and other hardware
Step 3: Construction
Begin by building the main body of your dehydrator. If you're using wood, ensure all interior surfaces are sealed with a food-safe finish to prevent moisture absorption. Install your heating element, fan, and thermostat according to your design.
Next, create the trays or racks that will hold your food. These should be easily removable for cleaning and loading. If you're building a solar dehydrator, install the clear top and ensure it's angled to maximize sun exposure.
Step 4: Testing and Adjustments
Once your DIY food drying machine is assembled, it's time for testing. Run your dehydrator empty to check for any issues with airflow or temperature control. Make adjustments as needed to ensure even drying across all trays.
Using Your Homemade Food Dehydrator
With your DIY food drying machine complete, it's time to start preserving! Here are some tips for getting the most out of your new dehydrator:
1. Prepare your food consistently: Cut fruits and vegetables into uniform pieces to ensure even drying.
2. Arrange food properly: Leave space between pieces on the trays for air circulation.
3. Rotate trays: If your dehydrator doesn't have a fan, rotate the trays periodically for even drying.
4. Store dried foods properly: Once dehydrated, store your foods in airtight containers in a cool, dark place.
5. Experiment with different foods: Try drying herbs, making fruit leathers, or creating your own jerky recipes.
Benefits of DIY Food Drying Machines
Creating your own food dehydrator offers numerous advantages:
1. Cost-effective: Building your own machine is often cheaper than buying a commercial dehydrator.
2. Customizable: You can design your dehydrator to fit your specific needs and space constraints.
3. Sustainable: Especially with solar models, DIY dehydrators can be incredibly energy-efficient.
4. Educational: The building process teaches valuable skills in construction and food preservation.
5. Quality control: You have complete control over the materials and construction, ensuring food safety.
Conclusion
DIY food drying machines offer a fantastic way to preserve your harvest, reduce food waste, and explore sustainable food preservation techniques. Whether you opt for a solar food dryer, an electric food dehydrator, or an upcycled creation, the process of building and using your own dehydrator can be both rewarding and educational.
By embracing these homemade food dehydrator projects, you're not only saving money and reducing your environmental impact but also connecting with age-old traditions of food preservation. So why not start planning your DIY food drying machine today? Your future self will thank you when you're enjoying delicious, homemade dried fruits, vegetables, and jerky all year round!

Frequently Asked Questions
1. What are the best foods to dry in a homemade food dehydrator?
Answer: Many foods are suitable for drying in a homemade food dehydrator. Some of the best options include:
- Fruits: apples, bananas, berries, mangoes, and pineapples
- Vegetables: tomatoes, carrots, onions, and peppers
- Herbs: basil, oregano, thyme, and parsley
- Meats: beef, chicken, and fish for jerky
2. How long does it take to dry food in a DIY food drying machine?
Answer: Drying times can vary depending on the food type, thickness of slices, and the efficiency of your dehydrator. Generally, fruits and vegetables can take anywhere from 6 to 16 hours, while meats for jerky may take 4 to 15 hours. It's important to check your food regularly and follow specific recipes for best results.
3. Is it safe to use a homemade food dehydrator?
Answer: Yes, when built and used correctly, homemade food dehydrators are safe. Ensure that all materials used are food-safe, maintain proper temperatures (typically between 95°F to 165°F depending on the food), and follow food safety guidelines for preparation and storage of dried foods.
4. How do I clean my DIY food drying machine?
Answer: Clean your dehydrator after each use. For most models:
1. Unplug the unit and allow it to cool completely.
2. Remove trays and wash them with warm, soapy water.
3. Wipe down the interior with a damp cloth.
4. For tough residues, use a mixture of warm water and vinegar.
5. Dry all components thoroughly before reassembling.
5. Can I use my DIY food dehydrator for other purposes?
Answer: Absolutely! Besides drying foods, your homemade dehydrator can be used for:
- Drying flowers for crafts
- Making potpourri
- Drying herbs for teas or spices
- Creating pet treats
- Drying seeds for gardening
Always ensure thorough cleaning between different uses, especially when switching between food and non-food items.


")

