Content Menu
● Introduction
● Understanding the Basics of Fruit Dehydration
● Types of DIY Fruit Dryer Machines
>> 1. Solar Food Dryer DIY
>> 2. Electric Fruit Drying Machine
● Building Your Own DIY Fruit Dryer Machine
>> Materials Needed:
>> Steps:
● Tips for Using Your DIY Fruit Dryer Machine
● Creative Applications for Your Dried Fruits
● The Benefits of Using a DIY Fruit Dryer Machine
● Troubleshooting Common Issues
● Expanding Your DIY Food Preservation Journey
● Conclusion
● Frequently Asked Questions
>> Q1: How long does it take to dry fruits in a DIY fruit dryer machine?
>> Q2: Can I use my DIY fruit dryer machine for other foods?
>> Q3: How do I clean and maintain my DIY fruit dryer machine?
>> Q4: Is it safe to leave my DIY fruit dryer machine running overnight?
>> Q5: How long can I store fruits dried in my DIY fruit dryer machine?
Introduction
In an era where sustainability and self-sufficiency are becoming increasingly important, the DIY fruit dryer machine has emerged as a game-changer for food enthusiasts and health-conscious individuals alike. This comprehensive guide will explore the world of homemade fruit dehydrators, from their benefits and construction to usage tips and creative applications. Whether you're looking to preserve your garden's harvest, create healthy snacks, or embark on a new culinary adventure, a DIY fruit dryer machine is your ticket to a world of delicious possibilities.
Understanding the Basics of Fruit Dehydration
Before diving into the construction of your own fruit dryer, it's essential to understand the science behind fruit dehydration. The process involves removing moisture from fruits to inhibit the growth of bacteria, yeast, and mold, thereby extending their shelf life. This ancient preservation technique not only helps reduce food waste but also concentrates flavors and nutrients, making dried fruits a nutritious and convenient snack option.

Types of DIY Fruit Dryer Machines
1. Solar Food Dryer DIY
One of the most eco-friendly options for fruit dehydration is the solar food dryer. This type of DIY fruit dryer machine harnesses the power of the sun to dry fruits naturally. Solar dryers typically consist of a transparent top to allow sunlight in, a series of trays for holding the fruit, and vents for air circulation.
Benefits of solar food dryers include:
- Zero energy costs
- Environmentally friendly
- Preserves nutrients better than some artificial heating methods
- Can be used in remote areas without electricity
2. Electric Fruit Drying Machine
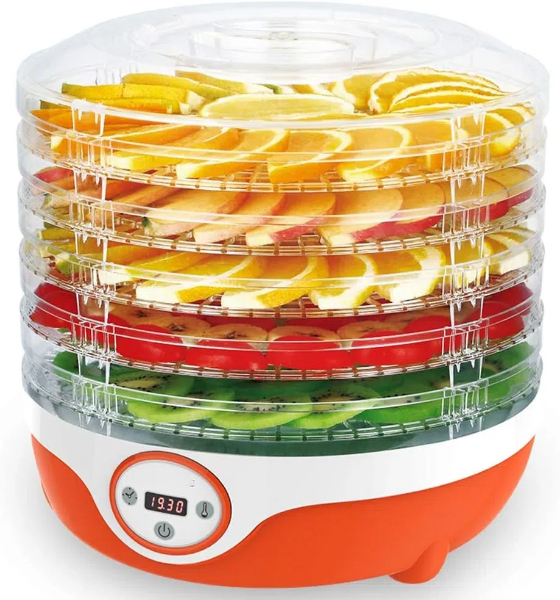
For those seeking a more controlled and consistent drying process, an electric fruit drying machine is an excellent choice. These DIY fruit dryer machines use electric heating elements and fans to circulate warm air over the fruit, ensuring even drying regardless of weather conditions.
Advantages of electric fruit dryers include:
- Consistent results
- Faster drying times
- Can be used indoors
- Suitable for all climates
Building Your Own DIY Fruit Dryer Machine
Creating a homemade fruit dehydrator can be a rewarding project that allows you to customize your drying setup to your specific needs. Here's a step-by-step guide to building a basic electric fruit dryer:
Materials Needed:
- Wooden boards or plywood
- Mesh screens or food-grade drying trays
- Small electric fan
- Heating element (such as a light bulb or heating coil)
- Thermostat (optional, for temperature control)
- Screws and hinges
- Insulation material (optional)
Steps:
1. Design and build the frame: Create a box-like structure with dimensions suitable for your needs. Ensure there's enough space for multiple trays and air circulation.
2. Install trays: Cut mesh screens or use food-grade drying trays to fit inside your frame. These will hold the fruit during the drying process.
3. Set up the heating element: Install a light bulb or heating coil at the bottom of the dryer. If using a thermostat, connect it to the heating element for temperature control.
4. Add the fan: Place a small electric fan near the heating element to circulate warm air throughout the dryer.
5. Create vents: Cut small openings at the bottom and top of the dryer to allow for proper air circulation.
6. Insulate (optional): Line the inside of the dryer with insulation material to improve energy efficiency.
7. Finish and test: Add a door with hinges, sand any rough edges, and run a test cycle to ensure everything works correctly.
Tips for Using Your DIY Fruit Dryer Machine
Now that you've built your homemade fruit dehydrator, here are some tips to ensure the best results:
1. Prepare fruits properly: Wash and slice fruits evenly to ensure consistent drying.
2. Pre-treat when necessary: Some fruits benefit from pre-treatment with lemon juice or ascorbic acid to prevent browning.
3. Arrange fruits in a single layer: Avoid overcrowding to allow for proper air circulation.
4. Rotate trays: If your dryer doesn't have a fan, rotate trays periodically for even drying.
5. Check for doneness: Fruits should be pliable but not sticky when properly dried.
6. Store correctly: Once dried, store fruits in airtight containers in a cool, dark place.

Creative Applications for Your Dried Fruits
Your DIY fruit dryer machine opens up a world of culinary possibilities. Here are some creative ways to use your dried fruits:
1. Homemade trail mix: Combine dried fruits with nuts and seeds for a healthy snack.
2. Fruit-infused teas: Add dried fruits to loose-leaf teas for unique flavor combinations.
3. Baked goods: Incorporate dried fruits into muffins, cookies, and bread for added texture and flavor.
4. Fruit powders: Grind dried fruits into powders for use in smoothies or as natural food coloring.
5. Fruit leather: Blend and dry pureed fruits for a chewy, portable snack.
The Benefits of Using a DIY Fruit Dryer Machine
Investing time in creating a homemade fruit dehydrator offers numerous advantages:
1. Cost-effective: Save money on store-bought dried fruits and reduce food waste.
2. Customization: Control the drying process and experiment with different fruits and flavors.
3. Healthier snacks: Avoid added sugars and preservatives found in commercial dried fruits.
4. Sustainable living: Reduce your carbon footprint by preserving local, seasonal produce.
5. Educational: Learn about food preservation techniques and share knowledge with others.
Troubleshooting Common Issues
Even with the best DIY fruit dryer machine, you may encounter some challenges. Here are solutions to common problems:
1. Uneven drying: Rotate trays or adjust fan speed for more consistent results.
2. Mold growth: Ensure fruits are properly pre-treated and dried thoroughly before storage.
3. Over-drying: Monitor drying times closely and test for doneness regularly.
4. Inconsistent temperature: Install a thermostat or adjust your heating element for better control.
5. Fruit sticking to trays: Use non-stick mats or lightly oil mesh screens before use.
Expanding Your DIY Food Preservation Journey
Once you've mastered your DIY fruit dryer machine, consider exploring other food preservation techniques:
1. Canning: Preserve fruits and vegetables in jars for long-term storage.
2. Fermentation: Create probiotic-rich foods like sauerkraut and kimchi.
3. Freezing: Learn proper techniques for freezing fruits and vegetables to maintain quality.
4. Pickling: Experiment with various pickling methods for fruits and vegetables.
5. Smoking: Try smoking fruits for unique flavors in both sweet and savory dishes.
Conclusion
A DIY fruit dryer machine is more than just a tool for food preservation—it's a gateway to a more sustainable, healthy, and creative lifestyle. By building and using your own homemade fruit dehydrator, you're taking control of your food supply, reducing waste, and opening up a world of culinary possibilities. Whether you opt for a solar food dryer DIY project or an electric fruit drying machine, the rewards of dried fruits are boundless. So roll up your sleeves, gather your materials, and embark on this exciting journey of food preservation and culinary exploration.

Frequently Asked Questions
Q1: How long does it take to dry fruits in a DIY fruit dryer machine?
A1: Drying times can vary depending on the type of fruit, its water content, and the efficiency of your dryer. Generally, most fruits take between 6 to 36 hours to dry completely. Berries and thin-sliced apples might dry in 6-12 hours, while denser fruits like pears or peaches can take 24-36 hours. It's important to check your fruits regularly and adjust drying times as needed.
Q2: Can I use my DIY fruit dryer machine for other foods?
A2: Absolutely! While designed primarily for fruits, your homemade dehydrator can be used for a variety of foods. Vegetables, herbs, and even meats (for jerky) can be dried using the same machine. Just be sure to adjust temperatures and drying times accordingly, and always follow proper food safety guidelines, especially when drying meats.
Q3: How do I clean and maintain my DIY fruit dryer machine?
A3: Regular cleaning and maintenance are crucial for the longevity and efficiency of your dryer. After each use, wipe down trays and the interior with a mild soap solution and dry thoroughly. Periodically check and clean fans and vents to ensure proper air circulation. For wooden dryers, occasionally treat the wood to prevent warping. Always unplug electric components before cleaning and ensure everything is completely dry before the next use.
Q4: Is it safe to leave my DIY fruit dryer machine running overnight?
A4: If you've built your dryer following proper safety guidelines, it should be safe to run overnight. However, for peace of mind, especially with DIY electric models, it's advisable to use your dryer when you can monitor it. If you must run it overnight, ensure it's placed in a well-ventilated area away from flammable materials. Consider installing a timer or automatic shut-off feature for added safety.
Q5: How long can I store fruits dried in my DIY fruit dryer machine?
A5: Properly dried and stored fruits can last for several months to a year. The key is to ensure they are completely dry and stored in airtight containers in a cool, dark place. Vacuum sealing can extend shelf life even further. Always check for any signs of mold or unusual odors before consuming stored dried fruits. For best quality and nutritional value, it's recommended to use dried fruits within 6-12 months.


