Content Menu
● Introduction
>> What is a Heat Pump Dryer?
● Benefits of Using Heat Pump Dryers for Food Processing
● Step-by-Step Installation Guide
>> Step 1: Choose the Right Location
>> Step 2: Prepare the Installation Site
>> Step 3: Unpack and Inspect the Dryer
>> Step 4: Connect the Dryer to Power Supply
>> Step 5: Install Exhaust Duct (if applicable)
>> Step 6: Set Up Water Drainage System
>> Step 7: Level the Dryer
>> Step 8: Conduct Initial Testing
>> Step 9: Begin Food Drying Process
>> Additional Tips for Effective Food Drying
● Maintenance Tips for Heat Pump Dryers
● Conclusion
● FAQ
>> 1. What types of foods can be dried using a heat pump dryer?
>> 2. How long does it take to dry food using a heat pump dryer?
>> 3. Is it necessary to pre-treat foods before drying?
>> 4. Can I use my heat pump dryer indoors?
>> 5. What maintenance is required for my heat pump dryer?
Introduction
Heat pump dryers have become increasingly popular in both residential and commercial settings due to their energy efficiency and effectiveness in drying various materials. In this guide, we will delve into the installation process of heat pump dryers, specifically focusing on food drying applications. This comprehensive article will provide step-by-step instructions, tips, and best practices to ensure a successful installation.
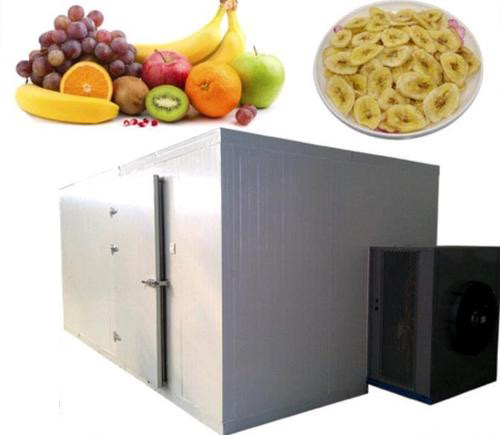
What is a Heat Pump Dryer?
A heat pump dryer is a type of drying equipment that utilizes a heat pump to recycle air and remove moisture from products. Unlike traditional dryers that expel hot air outside, heat pump dryers are designed to be energy-efficient by reusing the heat generated during the drying process. This makes them ideal for food drying applications, where maintaining product quality is crucial.
Benefits of Using Heat Pump Dryers for Food Processing
- Energy Efficiency: Heat pump dryers consume significantly less energy compared to conventional dryers. They operate at lower temperatures, which reduces energy consumption while still effectively removing moisture.
- Temperature Control: They offer precise temperature control, which helps preserve the nutritional value of food products. This is particularly important for sensitive items like fruits and vegetables that may lose flavor and nutrients at high temperatures.
- Environmentally Friendly: By recycling heat, these dryers reduce greenhouse gas emissions. Their efficient use of energy also contributes to lower operational costs.
- Versatility: Heat pump dryers can be used for various food items, including fruits, vegetables, meats, and even herbs. This versatility makes them an excellent choice for both home cooks and commercial operations.
- Quality Preservation: The gentle drying process minimizes damage to food items, helping maintain texture and flavor. This is especially beneficial for gourmet food production where quality is paramount.
Step-by-Step Installation Guide
Installing a heat pump dryer requires careful planning and execution. Below is a detailed step-by-step guide to help you through the process.
Step 1: Choose the Right Location
Considerations for Location
- Ensure adequate space for the dryer, allowing for airflow and maintenance access. A minimum clearance of 15 cm (6 inches) around the unit is recommended to facilitate proper ventilation.
- The area should be dry and well-ventilated to prevent moisture buildup. Avoid placing the dryer in damp areas or basements where humidity levels are high.
- Avoid placing the dryer in direct sunlight or near heat sources. Excessive heat can affect the dryer's efficiency and performance.
Step 2: Prepare the Installation Site
Site Preparation Steps
1. Clean the Area: Remove any debris or obstructions from the installation site to create a safe working environment.
2. Level the Floor: Ensure that the floor is level to prevent vibrations during operation. Use a spirit level to check for evenness.
3. Electrical Supply: Check that there is an appropriate electrical supply available, as specified in the dryer's manual. Ensure that circuit breakers are rated correctly for your unit's power requirements.

Step 3: Unpack and Inspect the Dryer
Before installation, unpack the heat pump dryer carefully and inspect it for any damage during shipping. Check all components against the packing list provided by the manufacturer to ensure nothing is missing.
Step 4: Connect the Dryer to Power Supply
Electrical Connection Steps
1. Turn Off Power: Ensure that the power supply is turned off before making any connections.
2. Wiring: Follow the manufacturer's wiring diagram to connect the power supply to the dryer. Use appropriate wire sizes and types as specified in the manual.
3. Grounding: Make sure to ground the dryer properly to avoid electrical hazards. This step is critical for safety and compliance with local electrical codes.
Step 5: Install Exhaust Duct (if applicable)
Some heat pump dryers may require an exhaust duct for moisture removal.
Exhaust Duct Installation Steps
1. Measure Duct Length: Measure and cut the ducting to fit between the dryer and exit point.
2. Secure Connections: Use clamps or tape to secure all joints in the ducting, ensuring there are no leaks that could affect performance.
3. Check for Leaks: Ensure there are no leaks in the duct system that could affect performance by conducting a smoke test or using soapy water on joints while running air through it.
Step 6: Set Up Water Drainage System
Heat pump dryers typically collect moisture in a reservoir or require drainage.
Drainage Setup Options
- Reservoir Method: If using a reservoir, ensure it is easily accessible for regular emptying. Consider placing a reminder system or schedule for maintenance checks.
- Direct Drainage Method: If draining directly, connect a hose from the dryer to a suitable drain point, ensuring that it slopes downward to prevent backflow.
Step 7: Level the Dryer
Once everything is connected, level the dryer using adjustable feet if necessary. This step is crucial for optimal performance and preventing vibrations during operation.
Step 8: Conduct Initial Testing
Before using your heat pump dryer for food processing, conduct an initial test run:
1. Power On: Turn on the power supply and start the dryer.
2. Check Functions: Ensure all functions are working correctly, including temperature settings and timers.
3. Monitor Performance: Observe how well moisture is being removed during this test run by checking humidity levels inside the drying chamber if possible.
Step 9: Begin Food Drying Process
Once you have confirmed that everything is functioning properly, you can start using your heat pump dryer for food processing:
1. Prepare Food Items: Wash and slice food items as needed before placing them in trays.
2. Load Trays into Dryer: Arrange trays evenly inside the dryer without overcrowding them to allow proper air circulation.
3. Set Temperature and Time: Adjust settings according to specific food drying requirements based on type; fruits generally require lower temperatures than meats.
4. Monitor Drying Process: Regularly check on your food items during drying to ensure they are drying evenly; rotate trays if necessary.
Additional Tips for Effective Food Drying
- Batch Size Management: Avoid overloading your dryer with too many items at once; this can hinder airflow and lead to uneven drying results.
- Use Quality Trays: Ensure that trays used in your heat pump dryer are made of materials suitable for high temperatures without leaching chemicals into food products.
- Regularly Rotate Items: If possible, rotate or rearrange items during drying cycles to promote uniformity in moisture removal across all trays.
- Maintain Consistent Airflow: Keep vents clear of obstructions at all times; this ensures consistent airflow which is vital for effective drying performance.
Maintenance Tips for Heat Pump Dryers
To ensure longevity and optimal performance of your heat pump dryer:
- Regularly clean filters and ducts to prevent clogs that can impede airflow.
- Inspect electrical connections periodically for wear or damage; replace any frayed wires immediately.
- Schedule professional maintenance checks annually if possible; this can help identify potential issues before they become significant problems.
Conclusion
Installing a heat pump dryer can significantly enhance your food processing capabilities while providing energy efficiency and maintaining product quality. By following this step-by-step guide, you can ensure a successful installation process that sets you up for effective food drying operations. With proper maintenance and care, your heat pump dryer will serve you well for years to come, allowing you to produce high-quality dried foods efficiently.

FAQ
1. What types of foods can be dried using a heat pump dryer?
Heat pump dryers can effectively dry a wide variety of foods such as fruits (e.g., apples, bananas), vegetables (e.g., tomatoes, peppers), herbs (e.g., basil, thyme), and meats (e.g., jerky).
2. How long does it take to dry food using a heat pump dryer?
The drying time varies depending on factors such as food type, thickness of slices, temperature settings, and humidity levels but typically ranges from several hours to over a day.
3. Is it necessary to pre-treat foods before drying?
Pre-treating foods like fruits with lemon juice or blanching vegetables can help preserve color and flavor but is not always necessary depending on personal preferences.
4. Can I use my heat pump dryer indoors?
Yes, heat pump dryers are designed for indoor use as they do not expel hot air outside like traditional dryers; however, proper ventilation is still recommended.
5. What maintenance is required for my heat pump dryer?
Regular maintenance includes cleaning filters, checking seals and gaskets for wear, inspecting electrical connections, and ensuring proper airflow around the unit.


