Content Menu
● Introduction
● Understanding the Freeze Drying Process
● DIY Freeze Drying Methods
>> 1. The Freezer Method
>>> Materials needed:
>>> Steps:
>> 2. The Dry Ice Method
>>> Materials needed:
>>> Steps:
>> 3. The Vacuum Chamber Method
>>> Materials needed:
>>> Steps:
● Best Foods for Home Freeze Drying
● Tips for Successful Home Freeze Drying
● Benefits of Freeze Drying Food at Home
● Creative Uses for Home Freeze-Dried Foods
● Comparing Home Freeze Drying to Other Preservation Methods
>> Freeze Drying vs. Dehydrating
>> Freeze Drying vs. Canning
● Troubleshooting Common Issues
● Safety Considerations
● Scaling Up: From Home to Small Business
● The Future of Home Freeze Drying
● Conclusion
● Frequently Asked Questions
>> Q1: How long do home freeze-dried foods last?
>> Q2: Can I freeze dry liquids at home?
>> Q3: Is it safe to freeze dry raw meat at home?
>> Q4: How do I rehydrate freeze-dried foods?
>> Q5: Can I freeze dry meals or recipes?
Introduction
Freeze drying is a popular method of food preservation that removes moisture from food while maintaining its nutritional value and flavor. While commercial freeze dryers are available, they can be expensive and not practical for everyone. Fortunately, there are several DIY freeze drying methods you can use at home without specialized equipment. In this comprehensive guide, we'll explore various techniques for freeze drying food without a machine, providing you with budget-friendly food preservation options and long-term food storage solutions.
Understanding the Freeze Drying Process
Before diving into the methods, it's essential to understand the basic principles of freeze drying. The process involves three main steps:
1. Freezing: The food is frozen solid, typically at temperatures below -40°F (-40°C).
2. Primary drying: The frozen water in the food sublimates, turning directly from ice to vapor.
3. Secondary drying: Any remaining moisture is removed through evaporation.
The goal is to remove as much water as possible while preserving the food's structure, nutrients, and flavor.

DIY Freeze Drying Methods
1. The Freezer Method
This method is the simplest and most accessible for home freeze drying, but it takes the longest time.
Materials needed:
- A freezer
- Baking sheets or trays
- Parchment paper
- Food items to freeze dry
Steps:
1. Prepare your food by washing, slicing, or chopping it into small, uniform pieces.
2. Line baking sheets with parchment paper.
3. Arrange the food in a single layer on the sheets, ensuring pieces don't touch.
4. Place the trays in the freezer, setting it to the coldest temperature possible.
5. Leave the food in the freezer for 2-3 weeks, checking periodically.
6. Test for dryness by removing a piece and letting it thaw. If it turns black, it needs more time.
7. Once fully dry, store in airtight containers or vacuum-sealed bags.
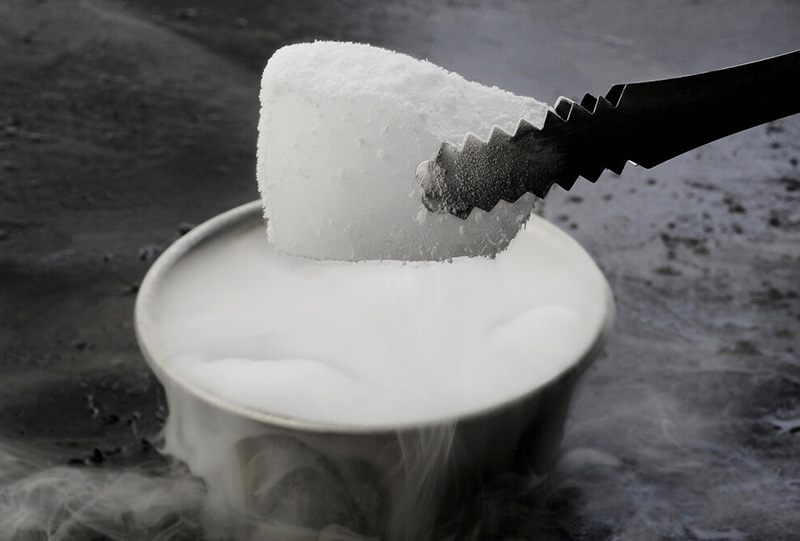
2. The Dry Ice Method
This method is faster than the freezer method but requires careful handling of dry ice.
Materials needed:
- Dry ice
- Cooler or insulated container
- Baking sheets or trays
- Food items to freeze dry
- Heavy-duty gloves
- Ventilated area

Steps:
1. Prepare your food as in the freezer method.
2. Place a layer of dry ice at the bottom of the cooler.
3. Put your trays of food on top of the dry ice.
4. Cover the food with another layer of dry ice.
5. Close the cooler, leaving it slightly open for gas to escape.
6. Leave for 24-48 hours, replacing dry ice as needed.
7. Check for dryness and store properly once complete.
3. The Vacuum Chamber Method
This method requires more equipment but can produce results similar to commercial freeze dryers.
Materials needed:
- Vacuum chamber
- Vacuum pump
- Freezer
- Baking sheets or trays
- Food items to freeze dry
Steps:
1. Freeze your prepared food items in the freezer for 2-3 hours.
2. Place the frozen food in the vacuum chamber.
3. Connect the vacuum pump and start the process.
4. Maintain the vacuum for 24-36 hours, depending on the food.
5. Check for dryness and store properly.
Best Foods for Home Freeze Drying
While you can freeze dry many types of food at home, some work better than others. Here are some excellent options for beginners:
1. Fruits: Berries, apples, bananas, and peaches
2. Vegetables: Peas, corn, carrots, and green beans
3. Herbs: Basil, parsley, cilantro, and mint
4. Lean meats: Chicken, turkey, and fish (cooked and shredded)
5. Dairy: Yogurt drops and cheese (grated)
Tips for Successful Home Freeze Drying
1. Choose fresh, high-quality produce for the best results.
2. Cut food into uniform, small pieces to ensure even drying.
3. Avoid fatty or oily foods, as they don't freeze dry well.
4. Be patient – home freeze drying takes time.
5. Store freeze-dried foods in airtight containers with oxygen absorbers.
6. Label containers with the date and contents for easy organization.
")
Benefits of Freeze Drying Food at Home
1. Long-term food storage: Properly stored freeze-dried foods can last up to 25 years.
2. Nutritional preservation: The process retains most of the food's original nutrients.
3. Flavor retention: Freeze-dried foods maintain their original taste.
4. Lightweight and compact: Ideal for camping, hiking, or emergency preparedness.
5. Versatility: Easily rehydrate and use in various recipes.
Creative Uses for Home Freeze-Dried Foods
1. Homemade trail mix with freeze-dried fruits
2. Instant soups and meals for camping
3. Colorful, crunchy garnishes for desserts
4. Powdered fruits and vegetables for smoothies
5. Lightweight, nutritious snacks for kids
Comparing Home Freeze Drying to Other Preservation Methods
Freeze Drying vs. Dehydrating
While both methods remove moisture from food, freeze drying typically results in better quality:
- Freeze-dried foods retain more nutrients and flavor.
- Freeze-dried products rehydrate faster and more completely.
- Dehydrated foods often shrink and change texture more than freeze-dried foods.
Freeze Drying vs. Canning
Both methods have their advantages:
- Freeze-dried foods are lighter and take up less space.
- Canned foods don't require rehydration and are ready to eat.
- Freeze-dried foods generally have a longer shelf life.
Troubleshooting Common Issues
1. Food turning black: This indicates that the food wasn't fully dried. Return it to the freezer or dry ice for additional time.
2. Mold growth: If you notice mold, the food wasn't dry enough before storage. Always ensure complete dryness before packaging.
3. Loss of color: Some color change is normal, but excessive fading might indicate overexposure to light during the process.
4. Clumping: If freeze-dried powder clumps together, it may have absorbed moisture. Use desiccant packets in storage containers to prevent this.
Safety Considerations
1. When using the dry ice method, always work in a well-ventilated area and wear protective gloves.
2. Ensure that all equipment is clean and sanitized to prevent contamination.
3. If freeze-drying meat or dairy products, cook them thoroughly before the process to eliminate harmful bacteria.
4. Always check for signs of spoilage before consuming freeze-dried foods, especially if they've been stored for a long time.
Scaling Up: From Home to Small Business
If you find success with home freeze drying, you might consider scaling up to a small business. Here are some considerations:
1. Invest in a commercial freeze dryer for increased capacity and efficiency.
2. Research local food safety regulations and obtain necessary permits.
3. Develop unique product lines, such as freeze-dried pet treats or gourmet camping meals.
4. Create attractive packaging and branding for your products.
5. Explore selling opportunities at farmers' markets, online platforms, or local specialty stores.
The Future of Home Freeze Drying
As interest in food preservation and self-sufficiency grows, home freeze drying is likely to become more popular. We may see:
1. More affordable, compact freeze dryers designed for home use.
2. Improved DIY methods and tools for freeze drying without machines.
3. Greater variety of freeze-dried products available in stores.
4. Increased focus on freeze drying as a solution for reducing food waste.
Conclusion
Freeze drying food without a machine is a rewarding process that allows you to preserve a wide variety of foods for long-term storage. While it requires patience and attention to detail, the results are well worth the effort. By using these DIY methods, you can enjoy the benefits of freeze-dried foods without investing in expensive equipment. Whether you're preparing for emergencies, reducing food waste, or creating unique culinary experiences, home freeze drying opens up a world of possibilities for food preservation enthusiasts.
Frequently Asked Questions
Q1: How long do home freeze-dried foods last?
A1: When properly packaged and stored in a cool, dry place, home freeze-dried foods can last up to 25 years. However, for best quality, it's recommended to consume them within 5-10 years.
Q2: Can I freeze dry liquids at home?
A2: While it's challenging to freeze dry liquids without a machine, you can freeze them into ice cubes or thin layers first, then use the dry ice or freezer method. This works well for broths, juices, and even coffee.
Q3: Is it safe to freeze dry raw meat at home?
A3: It's not recommended to freeze dry raw meat at home due to the risk of bacterial growth. Always cook meat thoroughly before freeze drying to ensure food safety.
Q4: How do I rehydrate freeze-dried foods?
A4: To rehydrate freeze-dried foods, simply add warm water until the food reaches its original consistency. The amount of water and time needed will vary depending on the food item.
Q5: Can I freeze dry meals or recipes?
A5: Yes, you can freeze dry complete meals or recipes. Cook the meal as you normally would, then freeze dry the components together. This is great for creating instant camping meals or emergency food supplies.


")